Help Center
Everything you need to know about PromoLinks, from getting started to advanced features.
What is PromoLinks?
PromoLinks is the smart link platform built for musicians, labels, and music professionals. Create beautiful landing pages for your releases, aggregate streaming links, track analytics, and manage your entire music presence from one dashboard.
Account Setup
After signing up, you'll go through a quick onboarding flow where you choose your role (Artist or Label), set your display name, and configure your first artist page or label profile. Your account is linked to your email via Clerk authentication.
Dashboard Overview
The dashboard is your command center. From here you can create and manage PromoLinks, customize your artist page, view analytics, and configure settings. The sidebar navigation adapts based on your role — artists see link management tools, while labels see roster and invitation management.
PromoLinks Labs (Early Access)
PromoLinks Labs gives you early access to new features before they launch publicly. Look for the small flask icon and toggle in the top navigation bar of your dashboard. Tap the flask to read what Labs is, then flip the switch and confirm to join. Turning the switch on unlocks new, unpublished beta features inside your dashboard: after joining, refresh the page and any available beta tools (such as Music Hub) appear in your sidebar with a "Beta" pill. With the switch off, those experimental features stay hidden. Labs features are experimental: they may be rough around the edges, change, break, or be removed at any time, and your feedback helps shape what eventually ships. You can leave Labs at any moment by switching the toggle off. Joining Labs never affects your plan, billing, or your live artist pages and PromoLinks.
Creating a PromoLink
Click "New PromoLink" from the dashboard to create a smart link. Enter your release details — title, artwork, and streaming URLs. PromoLinks automatically generates a shareable landing page that routes fans to their preferred streaming platform.
Auto-Link Detection
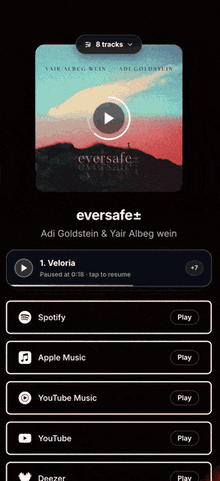
When creating a PromoLink, paste any major streaming URL and our system will automatically detect and populate links for other platforms. Supported platforms include Spotify, Apple Music, YouTube Music, Deezer, Tidal, Amazon Music, SoundCloud, and more.
Design & Templates
Each PromoLink can be customized with one of six professionally designed templates: Midnight (dark & cinematic), Neon (bold colors), Vinyl (retro aesthetic), Glass (modern glassmorphism), Aurora (gradient effects), and Studio (clean & professional). Each template offers different layouts for your cover art, streaming buttons, and audio preview. You can also customize the theme color and font to match your branding. On Pro and above, you can add an Animated Background that brings the whole page to life with live motion behind your cover and buttons.

See also
Animated Backgrounds
Give your PromoLink a living background that moves while fans are on the page. Animated Backgrounds are available on Pro and above and work with all six templates. Choose from 21 styles, from gentle motion like Grain Gradient, Aurora Waves, and Dotted Surface, to bold looks like Retro Grid, Plasma Grid, and Black Hole. The full list, with a short description of each, is in Animated Background Styles below. Turn it on in the create or edit wizard under Design (Step 3): find the Animated Background card, flip its switch to On, and pick a style. Most styles can be tuned to fit your release. Set colors, speed, glow, and intensity, turn a retro grid's CRT scanlines and neon on or off, and use the strength slider to make the motion as quiet or as vivid as you want. When it is on, the animation becomes your master background and takes over from your other background settings, sitting behind your cover art and buttons without ever blocking a tap. It plays on your live page. For social share images, where motion cannot be captured, your link falls back to your blurred cover art so previews still look great.
See also
Animated Background Styles
Here is every Animated Background style you can choose from, in the same order they appear in the picker. To browse them live, open the create or edit wizard, go to Design (Step 3), turn the Animated Background card on, then tap Change.
See also
Publishing & Sharing
Once your PromoLink is ready, publish it to make it live. You'll get a shareable URL (promolinks.me/your-slug) that you can share on social media, in emails, or embed on your website. Published links can be updated at any time without changing the URL.
Audio Previews
PromoLinks can include audio previews so fans can listen before clicking through to their platform. Audio previews are fetched automatically from Spotify or Deezer when available, giving visitors a 30-second preview of your release directly on the PromoLink page. Albums and EPs go further with a full tracklist preview: a tappable deck that gives each track its own 30-second preview. No preview showing up? That usually means Spotify and Deezer have no public preview for your track yet, which is always the case for unreleased music. You can make your own in minutes with our free Album Preview Maker: drop in your tracks, pick the best moments, and download a polished teaser to use anywhere.
Open the Album Preview MakerSee also
Album Previews and the Tracklist Player
Albums and EPs get something singles do not: a per-track preview deck. When a release has more than one track, the PromoLink shows a tappable tracklist with a separate 30-second preview for every track that has one. Fans tap any track to hear it, and the cover art doubles as a play button that plays through the album. You choose which track the cover play starts on in the create and edit wizard, under Design (Step 3), with the "Preview starts on" control, so visitors hear your strongest moment first. Previews are fetched automatically when they are available, and no audio is stored on our side. This works on top of the regular cover audio preview and independently of it, so an album can offer both.

See also
Album Preview Maker (Free Tool)
Music that is not out yet has no public audio anywhere, so the automatic preview has nothing to fetch. The free Album Preview Maker solves this. Drop in your tracks, drag the golden window to pick the best moment of each one, set the clip length and shape the fades, then download a polished teaser as WAV or MP3. Everything runs in your browser and nothing is uploaded, which keeps unreleased music safe. Upload the result as the audio preview on a PromoLink or a pre-save campaign and fans can hear the release before it exists anywhere else. It is completely free and needs no sign-up.
See also
QR Codes
Every PromoLink can generate a QR code that fans can scan to open your release page. Use QR codes on posters, merch, album packaging, or live event screens. The QR code links directly to your PromoLink page and can be downloaded as an image from the link detail view.
Embed Player
Embed your PromoLink directly on your website or blog with a compact embed player. The embed code renders a small, branded widget that fans can interact with — showing your artwork, streaming platform buttons, and audio preview. Copy the embed code from the link detail page.
Email Capture
Enable email capture on any PromoLink to collect fan emails before they click through to streaming platforms. Customize the headline, description, and button text. Collected emails are stored in your email lists and can be used for future marketing. You can optionally require a name along with the email address.
Link Gate — Overview
Link Gate lets you lock any PromoLink behind a gate. Visitors see a blurred preview of your content and must enter their email or a password to unlock it. There are two gate types: Email Gate (visitors enter their email to access, saved as a "Gate" subscriber) and Password Gate (shared password or unique one-time codes). To enable, click the lock icon on any link in your dashboard. Available on Pro, Manager, and Label plans.
Link Gate — Password & Unique Codes
Password Gate offers two modes: Shared Password (one password everyone uses) and Unique Codes (one-time codes that expire after use). You can generate up to 10 unique codes at a time. Each code can have a note/label attached (e.g. "for DJ Mike") so you can track who you sent it to. Click "+ note" next to any code to add a label, press Enter to confirm — it turns into a badge tag. Used codes are automatically moved to the "used" list and cannot be reused. If someone tries a used code, they see a friendly message asking them to contact the artist.
Link Gate — Redemption Tracking
Every time a password or code is redeemed, PromoLinks records the redemption with a timestamp, location (country and city), and the code label if one was set. View all redemptions in the sticky footer of the Link Gate modal — the Redemptions section shows each unlock with time ago, location, and the associated note. For shared passwords, you can see how many times the password was used and from where.
Link Gate — Email Notifications
Enable "Email me on unlock" in the Link Gate settings to receive an email notification every time someone redeems a password or code. The notification includes: the link title, the code or password used, the label/note (e.g. "Sent to: DJ Mike"), the visitor's location, and whether the code was consumed (for unique codes). The toggle is in the sticky footer of the Link Gate modal, always visible. Works for both shared passwords and unique codes.
Link Gate — Downloading Codes
You can download all your generated codes as a text file by clicking the "Save" button next to "Generate" in the Unique Codes section. The downloaded file includes: the link title, all available codes with their notes, and all used codes marked as used. This makes it easy to keep a local backup or share codes via email or messaging apps.
Text Blocks
Add free-form text blocks to your PromoLink alongside streaming buttons. Text blocks let you add a bio, release notes, credits, or any message. Customize with alignment (left, center, right), size (S, M, L, XL), and bold/italic styling. Add a text block from the "Add Platforms & Custom Links & Text" section in the link editor.
Grouping Custom Blocks
Tie related custom blocks together into a single group that moves as one. In the link builder (Step 2), when you add custom blocks one after another (a Custom Link, a Section Title, a Text Block, or a Divider), a small plus button appears on the seam between any two neighbors. Click it and the blocks get wrapped in one highlighted box with its own drag handle. Grab that handle and the whole group moves together, so reordering a set of related blocks is one drag instead of many. Inside a group you can still reorder the blocks individually, and the small link icon between two members splits them apart again. Double-click the group title to name it (for example Merch or Tour), and use Ungroup to release every block at once. Grouping is a builder convenience: your live PromoLink looks exactly the same, with the blocks shown in their order.
See also
Card View & Compact View
Your PromoLinks list has two view modes: Card View (large) shows bigger cover art, full stats, editable slug, and a bottom action bar with all tools. Compact View is the traditional table layout. Switch between them using the toggle icons next to the search bar. Your preference is saved automatically.
Editable Link Slug
In Card View, each PromoLink shows its full URL (e.g. adigoldstein.promolinks.me/my-song). Click the pencil icon to edit the slug. Press Enter to confirm — a dialog will show the old and new URL and warn that anyone with the old URL will no longer reach the link. The slug is sanitized automatically (lowercase, letters, numbers, and hyphens only).
Publish / Unpublish Toggle
Each PromoLink has a green/gray toggle switch to publish or unpublish it. Green means live (accessible to visitors), gray means offline. When you toggle, a centered overlay shows "Going Live" or "Taking Offline" with a progress animation. Unpublished links are not accessible to visitors but remain in your dashboard.
QR Code on Public Page
You can display a small QR code badge directly on your live PromoLink page. Open the QR Code modal from any link, then under "Show on Public Page" choose Bottom Left or Bottom Right. Additional options: Size (S, M, L), Transparent background, Frame border, and Hide on mobile. The QR code color matches the color preset you select. The QR includes the PromoLinks logo in the center.
Link Gate — Reusable Codes
Gate codes are now reusable — a code can be used multiple times by different people. Each code has a power toggle (green = active, red = deactivated). Deactivated codes are rejected with a friendly message. You can see how many times each code has been redeemed (shown as "3x" next to the code). To revoke access, simply deactivate the code.
Link Gate — Custom Codes
In addition to auto-generated codes, you can type your own custom codes. Use the input field above the code list — type your code, press Enter or click "+". Custom codes appear at the top of the list. They are auto-uppercased and validated for duplicates. Useful for memorable codes like "VIP2026" or "PRESS".
Source Copy — UTM Tracking per Platform
When copying a PromoLink URL, click the "Copy Link" button in Card View to see platform-specific copy options: Instagram, Twitter/X, TikTok, Facebook, WhatsApp, YouTube, and Email. Each option appends a utm_source parameter to your URL (e.g. ?utm_source=instagram). This lets you track exactly which platform drives the most traffic to your PromoLink. Share the Instagram-tagged link in your Instagram bio, the Twitter-tagged link in your tweets, etc. In your analytics dashboard, the "Top Referrers" section will show a breakdown by source so you can see which platform performs best and optimize your promotion strategy.
Artist Page Analytics
The Overview dashboard now has an "Analytics View" toggle to switch between PromoLinks stats and Artist Page stats. Artist Page stats track visits to your public artist page (e.g. adigoldstein.promolinks.me), including page views, link clicks (promo cards, social icons, custom links), unique visitors, CTR, referrers, geo breakdown, and device breakdown. The same period selector (Today, 3d, 7d, 14d, 30d, All) applies to both views.
Podcast Links
PromoLinks fully supports podcasts. Paste a Spotify podcast show or episode URL, an Apple Podcasts link, or a link from Overcast, Pocket Casts, Castro, Castbox, or Podcast Addict. PromoLinks automatically detects the podcast, fetches the show name and artwork, and generates cross-platform links so listeners can open the podcast in their preferred app. When you select "Podcast Episode" or "Podcast Show" as the release type, the platform picker shows podcast-specific platforms instead of music streaming services. Episode-level links are preserved for Spotify and Apple Podcasts, so fans land on the exact episode rather than just the show page.
Audiobook Links
PromoLinks supports audiobooks as a dedicated release type. Paste a Spotify audiobook URL, an Audible link, or an Apple Books link and PromoLinks will fetch the title, author, and cover art automatically. Cross-platform links are generated for all major audiobook platforms: Spotify, Apple Books, Audible, Google Play Books, Libro.fm, Kobo, Amazon, Chirp Books, Scribd, Bookmate, Storytel, YouTube, Barnes & Noble, Libby/OverDrive, and Hoopla. When "Audiobook" is selected as the release type, the platform picker shows audiobook-specific platforms, and the CTA buttons display "Listen" instead of "Play". Available on all plans.
What Are Pre-Save Campaigns?
Pre-save campaigns are designed for upcoming releases on Spotify and Apple Music. They let fans connect their streaming account and commit to saving your new track or album before it goes live. When release day arrives, PromoLinks automatically saves the release to every fan's library, driving first-day streams, boosting your save count, and signaling the algorithm to push your music to playlists and recommendations. Spotify is always available, and Apple Music is an optional add-on you switch on per campaign.
Why Use Spotify Pre-Saves?
The goal is simple: collect as many Spotify saves as possible before your release drops. Without pre-saves, release day starts at zero — fans need to remember, open Spotify, search for your track, and save it manually. Most won't. Pre-saves remove that friction entirely. The fan connects their Spotify account once with a single click, and the save happens automatically on release day. More saves on day one means more streams, better algorithmic placement, and a stronger chance of landing on Spotify editorial and algorithmic playlists. Artists using pre-saves see on average 3.2x more day-one saves compared to manual sharing, and 68% of pre-save fans stream within 48 hours.
Creating a Spotify Pre-Save Campaign
Go to Dashboard → Pre-save → Create Campaign. Enter your release title, artist name, cover artwork (upload or paste a URL), and release date. You can optionally add your Spotify album or track URL — if it's not available yet (e.g., your distributor hasn't delivered it to Spotify), you can add it later by editing the campaign. Add a description to tell fans about the upcoming Spotify release.
How the Fan Experience Works
Each campaign gets a public landing page with your cover art, a live countdown timer to release day, and a "Pre-save on Spotify" button. When a fan clicks the button, they authorize with their Spotify account (one click). That's it — they see a success message confirming their Spotify pre-save. On release day, the track automatically appears in their Spotify library.
Adding Apple Music to a Pre-Save
Every pre-save campaign can offer Apple Music alongside Spotify. In the campaign builder, open the Links step, turn on "Offer Apple Music pre-save", and paste your Apple Music album or song URL from music.apple.com. Once it is on, the public page shows a red "Pre-save on Apple Music" button under the Spotify one, and the share card displays both platforms. Apple Music is off by default, so existing campaigns stay unchanged until you enable it.
How Apple Music Pre-Save Works for Fans
When a fan taps "Pre-save on Apple Music" they sign in to Apple Music on the web and approve access. It is a one-time web sign-in: the first time, Apple asks the fan to sign in with their Apple ID (an active Apple Music subscription is required), and after that it is instant. On release day, PromoLinks adds the album or song to their Apple Music library automatically, using the same daily job that handles Spotify. Note on in-app browsers: Apple Music sign-in cannot run inside in-app browsers like Instagram, TikTok, or Telegram. If a fan opens your link there, the button shows an "Open in Safari" prompt so they can finish in a real browser. This is an Apple limitation that affects every pre-save service, not only PromoLinks.
Apple Music vs Spotify: What Is Different
The two work the same for you, with a few Apple-specific details worth knowing. Apple does not share a fan's name or email, so Apple pre-savers are anonymous in your notifications, while Spotify provides the display name and email. Apple authorization is always a web sign-in because no website can authorize through the native Apple Music app, so fans sign in on the web once instead of in the app. Apple pre-saves count toward your campaign's pledge total, and you get a Telegram alert tagged "Apple Music" for each one.
Future Save: Save Every Future Release
A normal pre-save covers one release. Future Save covers all of them. After a fan completes a pre-save, the success screen invites them to opt in to Future Save. If they say yes, every future pre-save campaign you create auto-saves to their Spotify library on its release day, with no further clicks from the fan. Your audience compounds release after release instead of starting from zero each time. Future Save is offered on every campaign by default, and you can switch it off per campaign in the Final touches step when you create or edit a campaign. It is tied to one artist: a fan who opts in for you does not start saving another artist's music.
See also
How Fans Opt In to Future Save (and Opt Out)
Future Save is always an explicit choice and is never pre-checked. The fan first completes the normal pre-save, then taps a separate "Yes, save my future releases" button on the success screen. Because Future Save keeps saving to a fan's library going forward, the permission stays theirs to control: a fan can withdraw it at any time by disconnecting PromoLinks from their Spotify account. When that happens, the next release simply skips them, and your Future Save fan count updates so it always reflects real, active fans.
One artist, one opt-in
Future Save consent applies only to the artist whose pre-save the fan opted in on. To receive another artist's future releases too, the fan opts in on that artist's pre-save as well.
Sharing Your Campaign
Copy your campaign's public link from the dashboard and share it everywhere — Instagram bio, Twitter, TikTok, email newsletters, ad campaigns, QR codes. Every click is a potential Spotify pre-save. The public page is mobile-optimized and works on any device. The more fans you reach, the more Spotify saves you collect on day one.
Release Day Execution
PromoLinks runs an automated job daily at 6:00 AM UTC. On your release date, it processes all pending pre-saves by securely refreshing each fan's Spotify token and saving the album or track to their Spotify library. You'll see the results in your campaign dashboard — total saves, successes, and any failures. All saves fire at once, creating a burst of activity that Spotify's algorithm notices.
Campaign Dashboard & Analytics
View all your campaigns in list or grid view. Each campaign shows its status (Active, Completed, or Canceled), release date, and total pledge count. Click into a campaign to see detailed stats: total pledges, pending, saved, and failed. The Overview dashboard also has a "Pre-Save" tab showing aggregate analytics across all your campaigns — page views, total pre-saves, unique visitors, conversion rate, and the number of active campaigns you're running.
Editing & Canceling Campaigns
Active campaigns can be edited — update the title, Spotify URL, or description at any time. You can also cancel a campaign if plans change, which prevents the release-day Spotify save from executing. Campaigns can be deleted permanently from the list view, which also removes all associated fan pledges.
Spotify URL — When to Add It
You can create a campaign without a Spotify URL and add it later. This is common when your distributor hasn't delivered the release to Spotify yet. Just make sure to add the Spotify album or track URL before the release date so the automated save can execute. Without it, the campaign will be marked as completed but no saves will be processed.
Notifications
Every new Spotify pre-save triggers a Telegram notification (if configured) with the fan's Spotify display name, email, and the running total of pledges. This lets you watch momentum build in real time as fans commit to saving your upcoming Spotify release.
Why Is There No Audio Preview of My Album?
Audio previews are pulled from public sources like Spotify, and unreleased music has no public audio anywhere yet. That is exactly the situation before a release drops, so your pre-save page (or PromoLink) has nothing to fetch. The fix is to create your own teaser: our free Album Preview Maker stitches the best moments of your tracks into one seamless audio preview, right in your browser. Your files never leave your device, which makes it safe for unreleased music. Download the MP3 and upload it as the audio preview on your pre-save campaign, and fans can hear the release before it exists anywhere else.
Create your audio previewSee also
How to Create Your Own Audio Preview, Easily and Fast
The free Album Preview Maker turns your tracks into a professional teaser in about two minutes. Drag in up to 20 audio files (MP3, WAV, FLAC, AAC, OGG), and the tool builds a playable mix automatically. Drag the golden window on each waveform to pick the moment that hits, set the clip length (15, 30, or 45 seconds per track in one click), adjust each track's volume, and shape the fades with linear, sine, or logarithmic curves. Everything regenerates automatically as you tweak. When it sounds right, download it as WAV or MP3 (or both, zipped, together with a timestamp timeline). No sign-up, completely free, and nothing is uploaded: the entire tool runs locally in your browser.

See also
What Are Events?
Events let you create stunning landing pages for your concerts, shows, listening sessions, album launches, DJ sets, and any live event. Each event gets its own URL on your subdomain (e.g. artist.promolinks.me/events/summer-concert) with a countdown timer, ticket links or RSVP form, and all your event details in one beautiful page.
Creating an Event
Go to Dashboard → Events → Create Event. Fill in the event title, date and time (with timezone), venue or virtual event details, cover image, description with rich text formatting (bold, italic, alignment, size), ticket URL, CTA button text, and ticket price. You can also choose the page background (blur, solid color, gradient, or image), theme color, and font from 16 options including Hebrew support.
Event Date, Time & Timezone
Set the event date and time using the calendar popup and time selector (hour, minute, AM/PM). Choose from 43 worldwide timezones — the timezone is displayed on the public event page next to the time (e.g. "8:00 PM (Jerusalem)"). Multi-day events are supported with an optional end date and time.
Venue & Location
Enter your venue name, address, city, and country. The address field has worldwide autocomplete powered by OpenStreetMap — start typing and get suggestions, with city and country auto-filled when you select. For virtual events, toggle "Virtual / Online Event" and paste your livestream URL.
Cover Image & Visual Design
Upload a cover image (drag-and-drop or click, max 5MB). Choose the cover shape: Square (1:1), Medium (4:3), or Wide (16:9 banner). Select a page background type: Blur (blurred cover image), Solid color, Gradient (6 dark-themed presets), or custom Image URL. Pick a theme color that affects the countdown timer, detail icons, ticket button, and social links. Choose from 16 fonts including Inter, Playfair Display, Bebas Neue, and David Libre for Hebrew.
RSVP & Email Capture
For free events (no ticket URL), the public event page shows an RSVP form where fans enter their email and optional name. Each RSVP triggers a Telegram notification with the fan's details and running total. You can toggle "Show RSVP count on event page" to display how many people are attending.
Rich Text Description
The description field has a rich text toolbar with alignment (left, center, right), font size (S, M, L, XL), bold, and italic. The styling is applied on both the dashboard preview and the public event page. RTL languages (Hebrew, Arabic) are auto-detected and text aligns right-to-left automatically.
Section Ordering & Visibility
Customize the layout of your public event page by reordering and hiding sections. In the edit view, open "Section Order" to drag-and-drop 9 sections: Cover Image, Title & Artist, Countdown Timer, Event Details, Ticket/CTA Button, Description, PromoLinks, Social Links, and RSVP Form. Toggle the eye icon to hide any section. Changes are reflected in the live preview in real-time.
Import PromoLinks on Event Page
Enable "Import your PromoLinks on event page" in Display Options to show your published PromoLinks as a "Releases" section on the event page. Fans can click through to your music while they're on the event page. The section shows cover art thumbnails with links to each PromoLink.
Live Preview
The event editor (both create and edit) features a live preview panel on the right side. It shows a phone or desktop mockup that updates in real-time as you type — title, cover image, countdown timer with actual days/hours/minutes, event details, ticket button with your custom text, description with styling, PromoLinks, and social icons. Toggle between Mobile and Desktop views.
Publishing & Unpublishing
Events have a publish toggle (green = live, gray = offline). Unpublished events return a 404 on the public page. After creating an event, a modal asks "Would you like to publish?" with options to publish now (shows a "Going Live" processing animation) or save as draft. You can toggle publish/unpublish from the events list.
Event Analytics
Each event has a dedicated analytics page accessible from the chart icon in the events list. View page views, clicks, unique visitors, CTR, and RSVPs over time with an interactive chart. See top referrers, country breakdown with flag emojis, and device breakdown with progress bars. Filter by period: Today, 3d, 7d, 14d, 30d, or All.
Card View & List View
The events list supports two views: Card View (default) shows large cover images with event details, days-left badge, price, RSVP count, action icons, and publish toggle. List View shows a traditional table with sortable columns. Toggle between views with the grid/list icons in the header.
Upcoming & Past Events
Filter events by Upcoming (future dates) or Past (past dates) using the toggle in the header. The empty state adapts its message based on the filter. Archived events are hidden by default — click "Archived (N)" to view and unarchive them.
Bulk Actions
Select multiple events using checkboxes, then use bulk actions: Duplicate (creates copies with "(Copy)" suffix), Archive (moves to archived state), or Delete (permanent, with confirmation modal listing all selected events). The action bar shows the count of selected events with a loading spinner during processing.
Editing Events
Click Edit on any event to open the full editor with all fields matching the create form: basic info, date/time/timezone, location with address autocomplete, cover image, visual design (background, theme color, font), tickets, display options, and section ordering. All changes are tracked — if you try to leave with unsaved changes, a modal asks you to Save, Discard, or Cancel.
Sharing Events
Every event gets a unique URL on your subdomain (e.g. artist.promolinks.me/events/summer-concert). Copy the link from the events list or detail page. The event page includes Open Graph meta tags with your cover image for rich previews when sharing on WhatsApp, Twitter, Facebook, and other platforms.
Walkthrough for New Users
When you first visit the Events tab with no events, a dismissible 5-step walkthrough explains: 1) Create Your Event Page, 2) Add Event Details, 3) Share With Your Fans, 4) Collect RSVPs or Sell Tickets, 5) Track Performance. Each step has a sketch illustration, description, and dash-style progress indicators.
Import Events from Bandsintown
Pull your upcoming tour dates directly from Bandsintown with one click. Go to Dashboard > Events and click "Import Events" (the teal button powered by Bandsintown). A modal opens where you can search for your artist name. The search supports both English and Hebrew, so you can type in your native language. Select your artist from the dropdown (showing your photo, tracker count, and number of upcoming events), then pick which events to import. Imported events are created as unpublished drafts with your Bandsintown artist photo as the cover image, venue details, date and time, and ticket links pre-filled. Events you have already imported are marked and skipped automatically, so you never get duplicates. Imported event cards show a green "BIT" badge in the events list. After importing, review and customize each event, then publish when ready. This feature is available on the Pro plan and above.
What is Playlist Spotlight?
Playlist Spotlight is a feature that lets you celebrate and share your Spotify playlist placements with your fans. When your track gets added to a playlist, you create a Spotlight page — a beautiful, shareable landing page with a Spotify deep link that takes listeners directly to your track inside the playlist, driving algorithmic engagement.
Drive algorithmic momentum
A Spotlight deep-links fans straight to your track inside the playlist, which signals real engagement to Spotify.
Why Use Deep Links?
A regular Spotify link sends fans to your track in isolation — after listening, Spotify plays random music by other artists. A Spotify deep link sends fans to your track within the playlist context. This means the playlist continues playing after your track, Spotify sees your track driving playlist engagement, and the algorithm rewards you with more visibility. It's the difference between a regular stream and an algorithmic signal.
Creating a Playlist Spotlight
From the Playlist Spotlight tab, click "Playlist Spotlight" to start. Paste two URLs: the Spotify playlist URL (where your track is featured) and your track URL. PromoLinks automatically fetches all the details — playlist name, cover art, follower count, track name, artist, and album art. A custom slug is generated from the playlist name so your Spotlight has a clean, shareable URL.
Customizing Your Spotlight Page
After creating a Spotlight, you're taken to the design editor. Here you can customize the theme (Minimal, Bold, Elegant, Neon), the track image display style (Spotlight, Card, Banner, Vinyl, Minimal), the background (blurred track art, gradient, or custom image), typography (title font, body font, font color, sizes), and the CTA button style (Spotify Green, Pill, Theme Color, Outlined, Minimal). You can also reorder or hide sections and upload a custom cover image.
Artist Description & Quotes
Every Spotlight page includes a personal message section where you can write a note to your fans about the placement. A "Generate Quote" button provides 40 pre-written templates that automatically insert your track name and playlist name — keep clicking until you find one that resonates. The description appears in a beautiful quote style with accent-colored quotation marks.
Custom URL & Slug
Each Spotlight gets a custom URL like yourname.promolinks.me/playlist/your-slug. The slug is auto-generated from the playlist name but you can customize it. A real-time availability checker shows a green checkmark when the slug is available. You can also edit the slug from the list page using the pencil icon next to the URL.
Track Card Styles
The track image display offers five different styles: Spotlight (large centered artwork — the default), Card (compact card with artwork on the left), Banner (full-width with artwork as a darkened background), Vinyl (round artwork like a record), and Minimal (text only, no image). Each style changes how the hero track image appears on the public page.
Publishing & Sharing
When you save your Spotlight, it's automatically published and accessible at your custom URL. Share the link on Instagram, Twitter, TikTok, email, or anywhere else. The public page includes Copy Link and Share buttons for fans to easily spread the word. The page also features your artist branding, social links, and a "Powered by PromoLinks" footer with privacy and terms links.
Changing Your Track or Playlist
If you need to update the playlist or track URLs, use the "Change" button at the top of the editor. This lets you re-enter the Spotify URLs and re-fetches all the data without losing your design customizations. The deep link is automatically regenerated with the new track and playlist context.
Analytics
Every Spotlight page tracks views, clicks, unique visitors, and click-through rate (CTR). Access detailed analytics by clicking the chart icon on any Spotlight card. The analytics page shows a time series chart, geographic breakdown with country flags, device breakdown (mobile, desktop, tablet), top referrers, and period-over-period comparisons. Select different time periods (1 day, 3 days, 7 days, 14 days, 30 days, or all time).
Autoplay Deep Links
Spotlight deep links include the &play=true parameter, which tells Spotify to automatically start playing your track when the listener clicks through. This means zero friction — one tap and your music is playing inside the playlist context.
Section Ordering
The Spotlight page layout is fully customizable. From the Section Order panel in the editor, you can drag sections to reorder them (Cover Image, Headline Badge, Playlist Info, Description, Listen Button, Social Links) and toggle visibility for each section using the eye icon. The footer (Powered by PromoLinks, Privacy Policy, Terms) is always fixed at the bottom and cannot be reordered.
Mobile Preview
The editor includes a live preview with Mobile and Desktop toggle. The mobile preview shows your Spotlight page inside a phone frame mockup with a dynamic island notch and home indicator, so you can see exactly how fans will experience your page on their phone.
Telegram Notifications
Every time someone creates a new Playlist Spotlight, a Telegram notification is sent with the playlist name, track name, artist, public URL, and the creator's name and email. This lets you monitor new Spotlight activity in real time.
What Is Your Artist Page?
Your artist page is your public profile on PromoLinks — a fully branded landing page that lives at your-name.promolinks.me (or a custom domain). It showcases your bio, avatar, social links, upcoming events, PromoLinks, and custom links all in one place. Set it up from Dashboard → Artist Page.
Public Page URL
Your artist page is available at promolinks.me/your-name and your-name.promolinks.me (both work). You can also connect a custom domain (e.g., links.yourname.com) for a fully branded experience. Share this URL as your link in bio — it's the one link that contains everything.

Themes
Choose from 4 built-in themes that control your page's color palette and typography. Minimal: clean and dark with Inter font. Bold: high-contrast amber/gold with Oswald titles. Elegant: deep purple with Playfair Display for a luxury feel. Neon: electric green accents with Space Grotesk. Each theme sets the background color, accent color, title font, body font, and card styling. Select your theme from the Appearance section in the Artist Page editor.
Cover Image & Background
Set a cover banner at the top of your page. Choose from three cover types: Gradient (choose from presets or build your own), Pexels (search millions of free stock photos by keyword), or Upload (your own image). Adjust the cover height (Slim, Medium, High) and the vertical position of the image. For uploaded images, a blur slider lets you soften the cover. The content body background can also be set separately — gradient, image, custom blur, or overlay opacity.
Avatar & Photo Settings
Upload your artist photo and control exactly how it appears. Choose the photo position: Center, Left, or Right. Set the overlap style — Below the cover (no overlap), Half (halfway over the cover edge), or Above (fully above the cover). Adjust photo size, add a decorative frame border with a custom color and thickness, and use the crop tool to perfectly frame your face. Toggle the photo on or off entirely if you prefer a text-only header.
Fonts & Colors
Override the theme's default fonts with any Google Font. Set a separate title font (for your artist name and section headings) and a body font (for bio and descriptions). Adjust font sizes independently for titles and body text. Set a custom font color to override the theme default — useful for light-background themes. All font changes preview in real-time.
Bio & Rich Text
Write your artist bio in the rich text editor. Apply formatting: left, center, or right alignment; small, medium, large, or extra-large text size; bold; and italic. Styling applies on both the editor preview and your live public page. RTL languages (Hebrew, Arabic) are auto-detected and text direction adjusts automatically. Bio has a character limit — a counter shows remaining characters.
Section Order & Visibility
Control exactly what appears on your artist page and in what order. From the Section Order panel, drag and drop 5 sections to reorder them: Bio, PromoLinks, Events, Custom Links, and Email Capture. Toggle the eye icon to hide any section entirely — it disappears from the public page but is not deleted. Default order is: Bio → PromoLinks → Events → Custom Links → Email Capture.
Custom Links
Add any links you want below your PromoLinks — merch store, website, booking, Bandcamp, Patreon, or anything else. Each custom link has a label, URL, and optional custom icon. You can also add Header items (non-clickable section titles, like "Merch" or "Booking") and Dividers (horizontal lines to separate groups). Drag to reorder. Button size can be set to Compact, Medium, or Full-width.
Grouping Custom Links
Keep related custom links tidy by tying them into a group. In your artist page editor, every custom link, header, and divider can be linked to the one next to it: click the plus button that appears on the seam between two rows and they join a single highlighted box. The box has its own drag handle, so you can move the whole set to a new spot in one drag instead of rearranging each row. You can still reorder rows inside the box, split a group with the link icon between two rows, name the group by double-clicking its title, or release everything with Ungroup. Grouping only affects the editor: your public artist page shows the links in the same order, exactly as before.
See also
Events on Your Artist Page
Your published events appear automatically in the Events section on your artist page. Choose the display style for how events appear: Card (default — full cover image with details), Compact (minimal list style), or Banner (full-width immersive). Visitors can click through to the full event page with countdown timer, ticket links, and RSVP. Toggle the Events section visibility or reorder it relative to other sections.
Email Capture on Artist Page
Enable an email capture widget directly on your artist page (separate from PromoLink-level email capture). Customize the headline, description, button text, and whether to require a name. Choose the widget size: Slim, Medium, or Big. Collected emails are saved as subscribers tagged with the artist page as the source. Toggle it on/off and reorder it within the section layout.
Live Preview
The Artist Page editor has a live preview panel on the right side that updates in real-time as you make changes — theme, cover, photo, fonts, bio, section order. Toggle between Mobile and Desktop views to see exactly how your page looks on different devices before saving.
Label Accounts
Labels get a dedicated dashboard with roster management, invitation system, and label-wide settings. As a label, you can manage multiple artists under your umbrella and oversee their PromoLinks and artist pages.
Labels are set up with our team
Label onboarding is handled directly with the PromoLinks team. There is no self-serve label signup, so reach out and we will get you set up.
Roster Management
View and manage all artists on your label from the Roster page. See each artist's page status, number of PromoLinks, and activity. Click into any artist to manage their content as if you were them.
Sending Invitations
Invite artists to join your label via email from the Invitations tab. Enter the artist's email and an optional personal message. The artist receives an email with a link to accept or decline. You can track the status of all invitations — pending, accepted, declined, or expired — and revoke pending invitations at any time.
Accepting & Declining Invitations
When an artist receives an invitation email, they click the link to view the invitation details — including the label name, logo, and any personal message. If they're not signed in, they'll be prompted to create an account (or sign in if they already have one). They can then accept to join the label's roster or decline. Accepted artists appear in the label's roster with full page management capabilities.
What Invited Artists Get
Invited artists who sign up through an invitation link get a free account automatically — no payment or onboarding wizard required. They are added to the label's roster with an artist page created under the label. Invited artists see a simple welcome page showing which label they belong to and a link to view their public artist page. Their page is managed by the label.
Going Independent
Invited artists can choose to "Go Independent" at any time from their dashboard. This starts the full onboarding process with plan selection and payment, giving them their own independent dashboard with analytics, promo link creation, and all standard features. The roster connection with the label is preserved.
Invitation Expiry & Revocation
Invitations expire automatically after 7 days. Expired invitations are marked as such and cannot be accepted. Labels can also manually revoke a pending invitation before it's accepted by clicking the trash icon. You can always copy the invite link and share it directly if the email didn't arrive.
Label Settings
Configure your label profile including label name, website, logo, cover image, description, social links, and contact information. These settings appear on your label's public page and help establish your brand across the platform.
Label Public Page
Your label gets its own public page at your-label.promolinks.me (or a custom domain). The label public page displays your logo, description, social links, and a showcase of all artists on your roster. Visitors can browse your roster and click through to each artist's page. It's your label's public-facing hub on PromoLinks.
Route Your Whole Roster Through Your Custom Domain
Once your label has a verified custom domain, you can route your entire roster through it: your artists' public pages, promo links, events, pre-saves, and playlist spotlights can all be served on that one branded domain. The whole visitor journey stays on your label's domain instead of switching to a promolinks.me subdomain. Turn it on from Settings > Domains using the link-routing toggle on your label's verified domain. It is off by default, so nothing changes until you enable it.
How Your Branded Links Look
With roster routing on, your artists' pages and releases use your domain across the board. For example, an artist page becomes link.yourlabel.com/artistname and a release becomes link.yourlabel.com/releasetitle, with events, pre-saves, and playlist spotlights following the same pattern. Every link shown on your label and artist pages points to your domain, so fans stay on your brand from start to finish.
Subdomains
Every artist and label automatically gets a subdomain: your-name.promolinks.me. This works out of the box and provides a clean, memorable URL for your public page.
Custom Domains
Connect your own domain (e.g., links.yourdomain.com) to your PromoLinks profile for a fully branded experience. Go to Settings → Domains to add and verify your custom domain.
DNS Setup
To connect a custom domain, add a CNAME record pointing to cname.vercel-dns.com. After adding the record, click "Verify" in your domain settings. DNS propagation can take up to 48 hours, but usually completes within minutes.
Dashboard Analytics
The dashboard overview shows key metrics at a glance — total clicks, unique visitors, top performing links, and recent activity. Use this to monitor your overall performance.
Per-Link Analytics
Each PromoLink has its own analytics showing clicks by platform, geographic distribution, and time-based trends. Access these from the link detail page to understand how fans interact with each release.
Click Tracking
All clicks on your PromoLinks are tracked in real-time. We record the platform clicked, timestamp, and referrer information. This helps you understand which platforms your audience prefers and optimize your promotion strategy.
Self-View Filtering
Your own views are automatically filtered out from analytics. When you are logged into your PromoLinks dashboard, any visits to your own PromoLinks from the same browser will not count as views or clicks in your stats. This means you can freely preview your links without inflating your numbers or triggering notifications like "Your first listener!" for yourself. The filtering works by recognizing your browser session — so your analytics reflect real fan engagement only.
Milestone Notifications
Get notified when your PromoLinks hit view milestones at 20, 50, 100, 500, 1K, 5K, and 10K views. Each milestone triggers a bell notification in your dashboard and an achievement email with stats — including your top platform by clicks, top country by views, total views, and total clicks. At 100 views, the email highlights that your full analytics dashboard is now available. Milestone notifications are available on all plans and can be toggled on or off from Settings → Notifications.
Exporting Analytics Reports
Export your PromoLink analytics as a PDF or CSV report. On any link's analytics page, click the "Export" button and choose your format. The PDF generates a clean, branded report with the PromoLinks logo, stat cards (views, clicks, unique visitors, CTR), platform breakdown, top countries with views and clicks, device breakdown, and top referrers — all using the Inter font. The CSV includes all analytics data in a structured, spreadsheet-friendly format. Both formats respect the currently selected time period (Today, 3d, 7d, 14d, 30d, or All).
PromoLinks for Mac
Download the PromoLinks Mac app to access your analytics and dashboard directly from your desktop — no need to open a browser. The app is available as a free DMG download from the footer of the website. Install it by opening the DMG file and dragging PromoLinks to your Applications folder. The Mac app gives you quick access to your stats, notifications, and link management.
PromoLinks Chrome Bridge — Overview
The PromoLinks Chrome Bridge is a Chrome extension that lets you create a PromoLink directly from any song page on Spotify, Apple Music, or YouTube — without ever opening the PromoLinks dashboard. Just browse to a song you want to promote, click the extension icon in your Chrome toolbar, and your PromoLink is created and copied to your clipboard instantly.
Step 1 — Install the Extension
1. Click the "Install Chrome Extension" button below (or search "PromoLinks Bridge" in the Chrome Web Store). 2. Click "Add to Chrome" and confirm the installation. 3. Once installed, you'll see the PromoLinks icon appear in your Chrome toolbar. If you don't see it, click the puzzle piece icon (Extensions) in the top-right of Chrome and pin PromoLinks to your toolbar.
Install Chrome ExtensionStep 2 — Generate Your Bridge Token
The extension connects to your PromoLinks account using a secure Bridge Token. Here's how to generate one: 1. Open your PromoLinks dashboard and go to Settings. 2. Scroll down to the "Chrome Bridge" section. 3. Click "Generate Token". 4. Copy the token immediately — it is only shown once and cannot be retrieved again. If you lose your token, simply revoke it and generate a new one. Your extension will stop working with a revoked token.
Step 3 — Connect the Extension to Your Account
1. Click the PromoLinks extension icon in your Chrome toolbar. 2. Paste the token you copied from Settings into the token field. 3. Click "Connect" — the extension will verify the token and link to your account. Once connected, you're ready to start creating PromoLinks directly from your browser.
Step 4 — Create a PromoLink from Spotify, Apple Music, or YouTube
1. Go to any song page on Spotify, Apple Music, or YouTube. 2. Click the PromoLinks extension icon in your Chrome toolbar. 3. The extension will automatically detect the track and pull in the title, artist, and cover art. 4. Click "Create PromoLink" — your link is created and the URL is copied to your clipboard instantly. You can then paste the PromoLink URL anywhere — social media bio, Instagram stories, ad campaigns, or anywhere else you promote your music.
Token Management
You can manage all your Bridge Tokens from Settings → Chrome Bridge. • Generate multiple tokens — useful if you use the extension on more than one device (e.g. your laptop and desktop). • Each token shows its creation date and the last time it was used, so you can track which devices are active. • Revoke a token at any time by clicking the trash icon next to it. Once revoked, any device using that token will immediately lose access. • If you ever think your token was compromised, revoke it immediately and generate a new one. Note: tokens are stored securely — we only store a hashed version and never the raw token itself.
What Are Tracking Pixels?
Tracking pixels (Meta Pixel and Google Analytics) let you measure how fans interact with your PromoLinks and artist page using your own analytics accounts. When a visitor opens your page or clicks a streaming link, an event is automatically sent to your connected Meta or Google account — giving you full visibility into your audience behavior, ad performance, and conversion data.
Set up in seconds
Add your Meta Pixel ID or Google Analytics ID under Settings, Integrations. Events fire automatically once connected, with no code to install.
Why Use Tracking Pixels?
If you run ads on Facebook, Instagram, or Google to promote your music, connecting your pixel lets you track exactly how many people visit your PromoLinks from those ads, which platforms they click, and how they engage. This data helps you build retargeting audiences (e.g., people who visited your link but didn't click), optimize your ad spend, and understand which releases or campaigns perform best.
How to Connect Meta Pixel
Go to Settings → Integrations and find the "Meta Pixel" card. Enter your Pixel ID (a numeric ID you can find in your Meta Events Manager at business.facebook.com) and click "Connect". Once connected, every visitor to your artist page and PromoLink pages will trigger a PageView event, and custom events like PromoLinkPageView and PromoLinkClick will fire automatically in your Meta Events Manager.
How to Connect Google Analytics
Go to Settings → Integrations and find the "Google Analytics" card. Enter your GA4 Measurement ID (starts with "G-", found in your Google Analytics admin under Data Streams) and click "Connect". Once connected, page views and custom events (ArtistPageView, PromoLinkPageView, PromoLinkClick) will appear in your Google Analytics reports in real-time.
How to Connect TikTok Pixel
Go to Settings → Integrations and find the "TikTok Pixel" card. Enter your TikTok Pixel ID (found in your TikTok Ads Manager under Events) and click "Connect". Once connected, visitor activity on your PromoLink pages and artist page is tracked via TikTok's pixel — helping you measure ad performance, build custom audiences, and run retargeting campaigns on TikTok.
What Events Are Tracked?
Once connected, the following events fire automatically: "ArtistPageView" when someone visits your artist page, "PromoLinkPageView" when someone opens one of your PromoLink pages, and "PromoLinkClick" when someone clicks a streaming platform button (includes the platform name like Spotify, Apple Music, etc.). All events include metadata such as the link title, artist name, and platform clicked.
Disconnecting a Pixel
To remove a connected pixel, go to Settings → Integrations and click "Disconnect" next to the integration. The tracking scripts will immediately stop loading on your public pages. Your historical data in Meta or Google Analytics is not affected — it stays in your analytics account.
Profile Settings
Update your display name, email, avatar, and other profile details from Settings → Profile. Changes here affect your dashboard identity and how your name appears in communications.
Everything lives under Settings
Profile, Domains, Notifications, Integrations and Account are all tabs in Settings. Jump straight to the right one with the in-app links throughout this guide.
Plans & Pricing
PromoLinks offers four plans: Indie ($9/mo or $7/mo yearly) with 1 artist page, unlimited track links, and basic analytics. Pro ($19/mo or $15/mo yearly) adds pre-save campaigns, email capture, Meta & TikTok pixel, 1 custom domain, and custom branding. Manager ($39/mo or $31/mo yearly) includes 3 artist pages, artist invitations, priority support, and Spotify/YouTube analytics (coming soon). Label (custom pricing) offers unlimited artist pages, up to 10 custom domains, and all features. All paid plans include a 7-day free trial with full access to every feature.
Free Trial
Every new account starts with a 7-day free trial with full access to all features. A card is required at signup, but you are not charged during the trial. When the 7 days end, your selected plan begins and your card is charged, unless you cancel first. You can cancel anytime before the trial ends and pay nothing. During the trial you can explore everything PromoLinks has to offer: smart links, templates, pre-save campaigns, email capture, analytics, and more.
Upgrading & Downgrading
You can upgrade or downgrade your plan at any time from Dashboard → Billing. Upgrades take effect immediately and you'll be charged the prorated difference. Downgrades take effect at the end of your current billing period so you keep access to premium features until then.
Canceling Your Subscription
To cancel your subscription, go to Dashboard → Billing and click "Cancel Plan". Your subscription will remain active until the end of the current billing period — you won't lose access immediately. You can resubscribe at any time. All your data (links, analytics, artist pages) is preserved even after cancellation.
Notifications
Configure how and when you receive notifications about your PromoLinks activity from Settings → Notifications. Available notification types include: First Listener (when someone first views your link), Milestone Views (achievement emails at 20, 50, 100, 500, 1K, 5K, and 10K views with stats), New Email Subscriber, New Pre-Save Pledge, Support Ticket Reply, Billing Changes, and Invitation Accepted. Each type can be individually toggled on or off. Milestone notifications send both a bell notification in your dashboard and an email with your top platform, top country, and link stats.
Integrations — Meta Pixel, Google Analytics & TikTok Pixel
Connect your own Meta Pixel, Google Analytics, or TikTok Pixel account to track visitor activity on your PromoLinks and artist page. Go to Settings → Integrations, enter your Pixel ID or Measurement ID, and click "Connect". Once connected, tracking scripts are automatically loaded on your public pages — no code required.
Deleting Your Account
You can permanently delete your account from Settings → Account → Delete Account. This will remove your profile, artist pages, PromoLinks, analytics data, custom domains, and all associated content. This action is irreversible and all data is permanently deleted. You must cancel your subscription before deleting your account — if you have an active paid subscription, you'll be prompted to cancel it first from Settings → Billing.
What Are Email Lists?
Email lists let you collect fan emails directly from your PromoLinks. When email capture is enabled on a PromoLink, fans can enter their email (and optionally their name) before accessing the streaming links. These subscribers are saved to your email lists for future marketing.
Managing Subscribers
Open Dashboard, Subscribers to see everyone you have collected. The page opens on the Subscribers tab, with two more tabs beside it: Unlock Activity and Broadcasts. Stat cards at the top show Total Subscribers, New This Week, New This Month, and how many Sources you collect from, plus a growth chart you can zoom from Today out to All time. Search by email or name, filter by status (Active or Unsubscribed), by the PromoLink or event a fan came from, or by tag. A row of source pills (Email Capture, Gate, Event, Imported, QR Giveaway, and any custom source) lets you jump to one source in a tap, each with a live count. The list loads in batches: choose 50, 100, 500, or 1000 with Load more, and a summary line always tells you how many of the total you are viewing. Each subscriber shows their email, name, tags, source, country, and the date they joined, and sorting and filtering apply across your whole list, not just the rows on screen.
Exporting Your Subscribers
Export your subscribers to a CSV file any time from the Export button on the Subscribers tab. You choose exactly which columns to include: email is always there, and you can add name, tags, source type, source link, country, city, status, and the subscribed date. For a full-list export you can also pick which source types to include, so you can pull just your gate signups or just your imports. Files are saved as UTF-8, so names in Hebrew, Arabic, and other non-Latin scripts open correctly in Excel and Google Sheets. To export only some people, tick their checkboxes first and the file covers just your selection.
Unlock Activity
Unlock Activity is a live log of every time a fan unlocks a gated PromoLink. Find it on the Unlock Activity tab of the Subscribers page (available on Pro and above). The Subscribers tab is the list of people you have collected; Unlock Activity is the record of unlock events, so it includes repeat unlocks and code-gate unlocks that may not add an email. Stat cards show Total Unlocks, Unlocks This Week, People Who Unlocked (unique people), and Repeat Unlockers (people who unlocked more than once), with a 30-day growth chart. Search by email, filter by a specific link, or filter by type: Email gate or Code gate. There are two ways to read it. Activity lists every unlock newest first: who unlocked (their email, or Anonymous for a code gate), which link they opened, the type (Email, or the actual Code used), a Returning badge if they were already on your list, where they were (city and country), and when. By person groups everything by email into a timeline, so you can see what one fan has unlocked over time. You can export the full log to CSV.
Subscribers vs Unlock Activity
The Subscribers tab is who is on your list. Unlock Activity is every unlock event, including repeat unlocks and code-gate unlocks that may not capture an email. Use Subscribers to email people, and Unlock Activity to see exactly what is being unlocked and by whom.
See also
Importing an Existing List
Already have a subscriber list somewhere else? Bring it in with the Import button at the top right of the Subscribers tab. You can either upload a CSV file (we automatically detect the email and name columns) or paste a list directly, one contact per line as "email, name" (the name is optional). We validate addresses, skip duplicates, and never resurrect anyone who previously unsubscribed. Imported contacts are marked with an "Imported" source tag. Importing requires the Audience Add-on (Pro plan and above) and you confirm you have permission to email these contacts. See the Audience Add-on section under Billing for details.
Unsubscribing
All emails sent through PromoLinks include an unsubscribe link in the footer. When a subscriber clicks it, they're taken to an unsubscribe page where they can confirm. Once unsubscribed, their status is updated and they won't receive further emails from your lists.
What Are Broadcasts?
Broadcasts let you email your subscribers directly from PromoLinks. Open the Subscribers page and switch to the Broadcasts tab to compose a message: write a subject and body with the rich text editor, optionally add a cover image and a call to action button, and choose a light or dark email theme. Broadcasts are available on the Pro plan and above. Every broadcast is sent from your artist name, with replies going to your own email, and includes a one-click unsubscribe link.
Choosing Your Audience
Pick "All subscribers" to email your whole confirmed list, or "Custom audience" to narrow it down by source, PromoLink, event, country, date range, or tags. You can also hand-pick individual subscribers. As you adjust the filters, a live count shows exactly how many people will receive the email. Unsubscribed contacts, opted-out contacts, and locked imported contacts are always excluded automatically.
Sending to Tag Groups
If you tag your subscribers, you can email just those groups. In Custom audience, open the Tags filter and select one or more tags. The broadcast goes to anyone who has any of the selected tags, and you can combine tags with other filters (like country) to narrow further. This is the easiest way to send a focused message to your VIPs, a specific city, or any segment you have tagged.
Test Preview & Sending
Before sending to your list, use "Send Preview" to email a test copy to yourself so you can check how it looks in a real inbox. When you're ready, "Send Broadcast" delivers it to everyone in your selected audience. Sending cannot be undone, so review the recipient count in the confirmation dialog first. After sending, you can track delivery, opens, and clicks for that broadcast.
Sending cannot be undone
Always Send Preview to yourself first, then double-check the recipient count in the confirmation dialog. A broadcast cannot be recalled once it goes out.
WhatsApp Broadcasts
If your subscribers shared a phone number and opted in to WhatsApp, you can reach them on WhatsApp as well as by email. When your list has at least one opted-in phone number, the New Broadcast button first asks whether to send by Email or WhatsApp. WhatsApp broadcasts are available on the Pro plan and above. Because WhatsApp only allows business messages that fans agreed to receive, every message goes out from the shared PromoLinks business number, carries a "Powered by Promolinks.me" footer, and reaches only fans who gave a phone number and ticked the WhatsApp opt-in.
Phone number and opt-in required
A fan only appears in your WhatsApp audience if they gave a phone number and opted in to WhatsApp. Collect this on your sign-up forms, or add it when you import or edit subscribers.
Creating a WhatsApp Template
WhatsApp marketing messages must use a template that WhatsApp approved in advance, so you cannot type free text at send time. In the WhatsApp composer, choose Manage templates to write one. We pre-fill a suggested message with your artist name already in it, which helps WhatsApp approve it. Use the [link] token for the link you will send, and the [name] token to greet each fan by name. You can also add an optional button that links to your page. When you submit, the template goes to WhatsApp for review: approval usually takes a few minutes and can take up to a day. Once approved, only your account can see and use it. Every template carries the "Powered by Promolinks.me" footer, which cannot be changed.
Approval takes a little time
After you submit a template, WhatsApp reviews the wording before you can send it. It moves from In review to Approved, and you can tap Check status to refresh. You can edit an approved template later, but editing sends it back for review.
Sending a WhatsApp Broadcast
Pick an approved template, then fill in its blanks: choose Fan's name to personalize each message, or type a fixed value such as your link. Choose your audience exactly like an email broadcast, by source, PromoLink, event, country, date range, or tags, and a live count shows how many opted-in fans will receive it. Send a test to one number first to see the real message, then Send broadcast. WhatsApp limits how many messages go out per day, so if your audience is larger than the daily cap the rest are queued for the next day. Every completed send is listed under WhatsApp broadcasts in the Broadcasts tab so you can see what went out.
Sending reaches real phones
A WhatsApp broadcast goes to real fans and cannot be recalled. Always send a test to yourself first and check the recipient count before you confirm.
SMS Broadcasts
If your subscribers shared a phone number and opted in to SMS, you can text them as well as email or WhatsApp them. When your list has at least one SMS opted-in number, the New Broadcast button offers Email, WhatsApp, and SMS. SMS is available on the Pro plan and above. Unlike WhatsApp, an SMS is plain free text with no template approval, which is also why SMS can reach United States fans that WhatsApp marketing messages cannot. SMS uses its own opt-in, separate from WhatsApp, because consent to receive text messages is treated separately. Every SMS automatically ends with a "Powered by Promolinks.me" footer that cannot be changed, and each message can be up to two SMS segments long.
Phone number and SMS opt-in required
A fan only appears in your SMS audience if they gave a phone number and ticked the SMS opt-in, which is separate from the WhatsApp opt-in. Add it when you import contacts or when you edit a subscriber.
Sending an SMS Broadcast
In the SMS composer, write your message as plain text. Use the [name] token to greet each fan by name; it fills in per person and falls back to "friend" when no name is on file. The composer shows how many SMS segments your message uses and an estimated cost, with the forced footer already counted. Messages are limited to two segments, so if you go over you will be asked to shorten before you can send. Choose your audience exactly like an email broadcast, by source, PromoLink, event, country, date range, or tags, and a live count shows how many opted-in fans will receive it. Send a test to one number first to see the real message, then Send broadcast. Every completed send is listed under SMS broadcasts in the Broadcasts tab.
Sending reaches real phones
An SMS broadcast goes to real fans and cannot be recalled. Always send a test to yourself first and check the recipient count before you confirm. If a fan replies STOP, they are automatically removed from future SMS.
Payment Methods
PromoLinks uses Stripe for secure payment processing. You can pay with any major credit or debit card. Your payment information is handled entirely by Stripe and never stored on our servers.
Billing Portal
Access your full billing history, update payment methods, and download invoices from the Stripe billing portal. You can reach it from Dashboard → Billing → Manage Subscription. The portal shows all past payments, upcoming charges, and allows you to update your card.
Monthly vs Yearly Billing
All plans are available with monthly or yearly billing. Yearly billing saves you up to 20% compared to monthly. You can switch between billing intervals from the billing page — changes take effect at the next renewal.
Audience Add-on
The Audience Add-on is an optional monthly subscription (available on Pro and above) that lets you import and store an external subscriber list so you can broadcast to it. It is billed separately from your base plan, layered on top. Choose a capacity tier with the slider: 1,000, 5,000, 10,000, 25,000, or 50,000 contacts (and Contact us for larger lists). You can buy or change your tier from the pricing page or from Dashboard → Billing & Plan, and you can switch tiers or cancel anytime. If you cancel, your imported contacts are not deleted: they stay reachable until the end of the paid period, then are locked (hidden and excluded from broadcasts) but kept safe. Re-subscribing restores them. Indie accounts need to upgrade to Pro before adding the add-on.
Billed on top of your plan
The Audience Add-on is layered on top of your base plan. Cancel anytime: your imported contacts are locked, never deleted, and restored if you re-subscribe.
Getting Help
If you need assistance, visit the Help Center from the footer of any page or from Dashboard → Help. The Help Center contains searchable documentation covering all features. You can also reach us via the Contact page or by emailing info@promolinks.me.
Two fast ways to reach us
Use the Contact page for a tracked support ticket, or email info@promolinks.me directly. We typically reply within 24 hours.
Support Tickets
Submit a support ticket from the Contact page by selecting the appropriate department (General, Billing, Account, or Bug Report). You'll receive a confirmation email with your ticket number. Our team responds within 24 hours. You can reply directly to the confirmation email to add more details to your ticket.
Reporting Bugs
Found a bug? Report it from Dashboard → Report a Bug. Describe what happened, what you expected, and include any relevant details like your browser and device. Bug reports help us improve the platform and are prioritized by our team.
System Status
Check the real-time status of all PromoLinks services at status.promolinks.me. This page shows uptime, any ongoing incidents, and scheduled maintenance. You can subscribe to status updates to get notified of any issues.
How It Works
The PromoLinks Refer & Earn program lets you earn passive income by referring new users to the platform. Share your unique referral link with other artists, labels, managers, or music professionals. When someone signs up through your link and subscribes to any paid plan (Indie, Pro, Manager, or Label), you earn a 15% recurring commission — every month, for as long as they stay subscribed. There are no caps or limits on how much you can earn.
See also
Your Referral Link
Find your unique referral link in Dashboard → Refer & Earn. Your link is automatically generated when you join the program. Copy it and share it on social media, in emails, YouTube descriptions, blog posts, or directly with your network. Every click and signup through your link is tracked automatically. You can also use sub-parameters to track different campaigns — for example, append ?sub1=youtube to your link to see which channel drives the most signups.
Commission & Payouts
You earn a 15% recurring commission on every paid subscription referred through your link. The commission is paid monthly and continues for as long as the referred user stays subscribed. For example, if you refer someone to the Pro plan ($19/mo), you earn $2.85 every month. If you refer 10 Pro users, that's $28.50/mo in passive income. Payouts are processed automatically via your preferred payment method with no minimum threshold — your money, when you want it.
Tracking Dashboard
Your Refer & Earn page includes a real-time affiliate dashboard powered by Affonso. From here you can see your total clicks, signups, active referrals, pending commissions, and total earnings. Each referral shows its status (pending, active, or churned) and the commission earned. The dashboard updates in real time so you always know exactly where you stand.
Who Can Join
Every PromoLinks user can participate in the Refer & Earn program — no special application required. Whether you're on the Indie, Pro, Manager, or Label plan, you get access to the affiliate dashboard and your unique referral link. Artists, producers, managers, labels, music bloggers, YouTubers, and anyone in the music industry can earn by sharing PromoLinks.
Tips for Earning More
Share your referral link where musicians hang out: music production forums, Discord servers, Facebook groups, Twitter/X, Instagram stories, and YouTube video descriptions. Write a short review or tutorial showing how you use PromoLinks — authentic recommendations convert best. If you run a blog or YouTube channel about music production or marketing, mention PromoLinks in your content with your referral link. The more targeted your audience, the higher your conversion rate.
What Is the Educational Program?
The PromoLinks Educational Program offers special discounts and resources to educators, students, and educational institutions. If you're a music professor, student, or part of a school or non-profit organization, you can apply for exclusive benefits — including discounted plan pricing, access to learning resources, and priority support.
Who qualifies
Educators, students, schools and non-profits can apply for discounted pricing and learning resources. Reach out and tell us about your program.
Who Qualifies?
The program is open to: accredited universities and colleges, high schools with music programs, music schools and conservatories, online learning platforms, non-profit music education organizations, and student organizations and clubs. Both individual educators/students and institutions applying on behalf of a group are welcome.
What Are the Benefits?
Approved applicants receive: a discount code for exclusive pricing on any PromoLinks plan (applied at checkout), access to exclusive guides and tutorials for music marketing education, and priority support to help you and your students succeed on the platform.
How to Apply
Visit promolinks.me/educational-program and fill out the application form. You'll need to provide: your full name and email, your institution name and type (university, high school, music school, online platform, non-profit, etc.), the number of people who will use PromoLinks, your role (professor, student, administrator, etc.), and an optional description of how you plan to use the platform. You can also upload proof of enrollment or an institution badge (image, max 10MB) to speed up approval.
Application & Approval Process
After submitting the form, you'll receive a confirmation on screen. Our team reviews every application within 3–5 business days. If approved, you'll receive a discount code by email that you apply at checkout when subscribing to any PromoLinks plan. There is no limit on how many students or faculty members from the same institution can apply individually.
What is Fan Wall?
Fan Wall is a per-PromoLink guestbook that lets your fans leave short notes (up to 280 characters) directly on your release page. It turns a passive listening link into a living, breathing community moment — fans can express what the song means to them, and you get social proof and engagement right where it matters most. Fan Wall is available on the Pro plan and above. If you are on a free trial, you can try Fan Wall during your 7-day trial period on any plan.
How to Enable Fan Wall
Fan Wall is available on the Pro plan and above. You'll find a "Fan Wall" tab in your sidebar. From there, you can enable Fan Wall on any PromoLink individually using the toggle next to each link. Fan Wall is off by default — you choose which releases get it. If you are on the Indie plan, upgrade to Pro to unlock Fan Wall after your trial ends.
How Fans Leave Notes
Visitors to your PromoLink page see a Fan Wall section below the platform buttons. They can type a note (minimum 10, maximum 280 characters), optionally enter their name, and submit. Notes appear instantly as sticky-note cards in a two-column grid. Fans receive a one-time edit token stored in their browser, allowing them to edit or delete their own note within 10 minutes of posting.
Managing Notes from the Dashboard
From Dashboard → Fan Wall → click "Manage" on any enabled PromoLink. Here you can see all notes (visible and hidden), with tools to: Pin up to 4 notes so they always appear first, Hide notes from visitors without deleting them, Restore hidden notes at any time, Edit the text of any note, and Delete notes permanently (with confirmation). Hidden notes are visible only to you in the dashboard under a collapsible "hidden notes" section.
Pinning Notes
You can pin up to 4 notes per PromoLink. Pinned notes always appear at the top of the Fan Wall, marked with a gold dot. Use pinning to highlight your favorite fan reactions, most heartfelt notes, or comments from notable fans. Click the pin icon next to any visible note to pin or unpin it. When you reach 4 pinned notes, you must unpin one before pinning another.
Display Settings
Each PromoLink's Fan Wall has independent display settings. From the management page, click the "Settings" button to open a popup with three toggles: Show avatars (fan profile pictures on each card), Show names (fan display names in the footer), and Show likes (heart count visible to visitors). All three are on by default. These settings let you control how much information is shown — for example, a fresh release might look cleaner with minimal info, while a successful release can show full engagement.
Likes and Replies
Visitors can heart any note by clicking the heart icon on the card or in the expanded view. Likes are tracked per session so each visitor can only like once. If a note has replies, a reply count badge (💬) appears next to the heart on the card. Clicking a note card opens an expanded overlay where fans can read the full note, like it, and leave a reply. Replies appear threaded below the original note in the overlay.
Note Moderation
Fan Wall has built-in moderation at multiple levels. URL stripping: any URLs in a note are automatically removed before saving. Profanity filter: notes containing blocked words are rejected. Rate limiting: a maximum of 50 notes per hour per PromoLink prevents spam. As the artist, you can hide any note from visitors (it stays in your dashboard) or delete it permanently. There is no public report/flag button — moderation is entirely in your control.
First Note Email Notification
When your Fan Wall receives its very first note, you'll get an email notification at the address linked to your PromoLinks account. The email includes the fan's name, the text of their note, and a direct link to the Fan Wall management page so you can view and manage it right away. Subsequent notes do not trigger individual emails — check your dashboard to see new activity.
What is Tip Jar?
Tip Jar lets your fans tip you directly from your PromoLink pages. When a fan loves your music, they can send you a tip with a personal note. You keep 100% of the tip with zero platform fees from PromoLinks. Tips are processed securely through Stripe or PayPal. Tip Jar is available on the Pro plan and above.
How to Set Up Tip Jar
Go to Dashboard > Tip Jar. You need to connect at least one payment method (Stripe or PayPal) to activate tipping. Once connected, a floating Tip badge appears on your PromoLink pages where fans can tap to send you a tip. You can connect both Stripe and PayPal at the same time to give fans a choice.
Connecting Stripe
Click "Connect with Stripe" in the Tip Jar dashboard. You will be redirected to Stripe's hosted onboarding flow where you set up your payout details (bank account, identity verification, etc.). Once Stripe approves your account, tips are deposited directly to your bank account. Stripe handles all payment processing securely. If your onboarding gets stuck, use the "Reset onboarding" link in the Tip Jar dashboard to start fresh.
Connecting PayPal
Enter your PayPal.me handle in the Tip Jar dashboard. You can paste a full PayPal.me URL (e.g. paypal.me/yourname), an @handle, or just your username. PromoLinks strips it down to the clean handle. When a fan chooses PayPal at checkout, they are redirected to your PayPal.me page with the tip amount pre-filled. PayPal tips go directly to your PayPal account.
Disconnecting a Payment Method
To disconnect Stripe or PayPal, go to the Tip Jar dashboard and click "Disconnect" next to the payment method. Disconnecting Stripe removes the Stripe Connect link, and disconnecting PayPal clears your PayPal.me handle. You can reconnect at any time. If both methods are disconnected, the Tip badge will no longer appear on your PromoLink pages.
Customizing the Tip Badge
The Tip badge is the floating button that appears on your PromoLink pages. From the Tip Jar dashboard, you can customize: the badge icon (heart, coffee, star, gift, music, or sparkles), the badge color (any hex color), and the button label text (up to 16 characters, defaults to "Tip"). The badge appears as a pill-shaped button in the corner of your PromoLink page with a subtle pulse animation.
Customizing the Tip Widget Text
You can personalize the text fans see when they open the tip widget. Three text fields are editable from the Tip Jar dashboard: the eyebrow text (small text at the top, up to 28 characters), the prompt text (the main message asking for a tip, up to 120 characters), and the button text (the CTA on the pay button, up to 16 characters). Leave any field empty to use the default copy. You can also set a custom display name (up to 40 characters) that appears instead of your artist name.
Thank-You Note
Write a personal thank-you note (up to 200 characters) that fans see after they send a tip. This message appears on a styled card alongside your artist avatar in the success screen. If you leave it blank, a warm default message is shown. A great thank-you note makes the tipping moment personal and memorable.
How Fans Send Tips
When a fan visits your PromoLink page and taps the Tip badge, an overlay opens with preset tip amounts ($1, $5, $10, $25) plus a Custom option for any amount between $1 and $500. The fan can optionally enter their name (up to 40 characters) and a personal note (up to 140 characters). They then enter their card details and submit. The payment is processed securely through Stripe, and the fan sees a celebratory success screen with confetti, a check animation, and your personal thank-you note.
Tip Jar Dashboard & Stats
The Tip Jar dashboard shows your connection status (Stripe and PayPal), your widget customization settings, and a list of all tips received. Each tip shows the amount, the fan's name and message (if provided), the payment status (succeeded, processing, or failed), and when it was sent.
Fees
PromoLinks charges zero platform fees on tips. You keep 100% of every tip. The only fees are Stripe's standard payment processing fees (typically 2.9% + 30 cents per transaction), which are deducted by Stripe before depositing to your bank account. PayPal tips are handled entirely by PayPal with their standard fees.
Currency
Tips are processed in USD by default. The currency symbol displayed to fans is determined by the artist's Stripe account settings. Supported currency symbols include USD ($), EUR, GBP, ILS, and more. The correct symbol is shown automatically based on your connected Stripe account.
Plan Requirements
Tip Jar is available on the Pro plan and above. If you are on a free trial, you can try Tip Jar during your 7-day trial period. Indie plan users will see a prompt to upgrade to Pro to unlock Tip Jar.
What Is Team Management?
Team Management lets label accounts invite collaborators to help run the label on PromoLinks. From Dashboard > Team, you can invite team members by email, assign roles, and manage access. Each member gets their own login and sees the label dashboard based on their role.
Roles & Permissions
There are three roles: Admin has full access to all label settings, billing, roster, and team management. Editor can manage artists, PromoLinks, events, and content but cannot change billing or team settings. Viewer has read-only access to the dashboard and analytics. The original label owner always has Admin access and cannot be removed.
The owner is always Admin
Admin, Editor and Viewer control what each member can do. The original label owner keeps full Admin access and cannot be removed or downgraded.
Inviting a Team Member
Click "Invite Member" on the Team page, enter their email address, and choose a role (Admin, Editor, or Viewer). They will receive an email invitation with a link to sign up or sign in. Once they accept, they appear in your team list with their assigned role. You cannot invite the same email address twice.
Changing Roles & Removing Members
To change a member's role, use the role dropdown next to their name and select a new role. The change takes effect immediately. To remove a member, click the remove button and confirm. Removed members lose all access to the label dashboard. The original owner cannot be removed or downgraded.
What Is the Roster?
The Roster is where labels manage their artists. From Dashboard > Roster, you can see all artists on your label, their page status, and relationship type. Each artist entry shows the artist name, slug, genres, and whether the page is active, draft, or archived.
Adding Artists
Click "Add Artist" to create a new artist page under your label. Fill in the artist name, choose a URL slug, add genres and a bio, and the page is added to your roster as "Owned" by default. The number of artists you can add depends on your plan's roster limit, shown as "Roster Slots: X/Y" at the top of the page.
Roster Relationships
Each artist on your roster has a relationship status. "Owned" means the label created the artist page. "Accepted" means the artist has claimed and joined the page. "Invited" means an invitation was sent but not yet accepted. "Declined" means the artist turned down the invitation. Use the filter tabs at the top to view artists by relationship type.
Searching & Filtering
Use the search bar to find artists by name. Filter tabs let you switch between All, Owned, Accepted, and Invited artists, each with a count badge. Click any artist row to view their full details, edit their page, or manage their PromoLinks.
Roster Limits
Your plan determines how many artist slots are available. When you reach your limit, the slot counter turns red and the "Add Artist" button is disabled. To add more artists, upgrade your plan or contact the team for a custom roster size.
Slots are plan-based
When you reach your roster limit the slot counter turns red and Add Artist is disabled. Upgrade your plan or contact us for a custom roster size.
What Are Collaborations?
Collaborations let a label take any release from one roster artist and display it on its other roster artists' pages, as a credited collaboration. It is perfect for joint releases, features, and label compilations: one release can live on several of your artists' pages at once, while still belonging to its original creator. Manage everything from Dashboard > Collaborations (label accounts only).
Linking a Release to Roster Artists
Open Dashboard > Collaborations to see every promo link across your whole roster. Find the release you want to share, click Link to expand it, then toggle the roster artists it should also appear on. As you toggle, the left side shows live page previews of exactly how the release looks on each artist's page, newest first. Linking and unlinking save instantly. A release can only be linked to artists in the same label roster, and never to its own creator, since it already shows on their page.
The "Collab" Handshake View
When a release is shared onto an artist, it appears in that artist's My Promolinks under a "Shared by your label" section, marked with a handshake Collab badge. Hovering the badge explains that the release is a collaboration set by the label. This makes it instantly clear which releases are collaborations and which are the artist's own links.
Who Can Edit or Unlink
A shared release is label-managed: collaborators can reorder it and show or hide it, but they cannot edit its content, delete it, or unlink it. Editing the release or unlinking a collaboration is done by the label from the Collaborations tab. Label Admins and Editors can manage collaborations; Viewers cannot.
How Referrals Work
PromoLinks offers a 15% recurring commission on every paid signup you refer. There are no caps, no minimum thresholds, and commissions are paid monthly. You earn for the lifetime of the referred user's subscription.
Getting Your Referral Link
Go to Dashboard > Refer to find your unique referral link. Copy it and share it with artists, producers, managers, or anyone who could benefit from PromoLinks. Every signup through your link is tracked automatically.
See also
Tracking Your Earnings
Your referral dashboard shows real-time clicks, signups, and earnings. You can see exactly how many people clicked your link, how many signed up, and how much commission you have earned. Payouts are processed monthly with no minimum threshold.
Who Can Refer?
All PromoLinks users on any plan can participate in the referral program. Whether you are on Indie, Pro, Manager, or Label, you can share your referral link and earn commissions on paid signups.
What Are QR Codes?
PromoLinks QR codes are trackable short links that redirect to any URL. Each QR code gets a unique short URL in the format promolinks.me/qr/{slug} and tracks every scan with detailed analytics including device type, browser, location, and more.
Creating a QR Code
Create a new QR code by entering a title, destination URL, and optionally adding UTM parameters (source, medium, campaign, term, content) for campaign tracking. The QR code is generated with a unique 6-character slug that is easy to scan.
Customizing the Design
Customize your QR code with different patterns (square, dots, rounded, classy, extra-rounded), corner styles, colors, and logos. You can add the PromoLinks logo, upload a custom logo, or use a text label. Choose the error correction level (L, M, Q, H) based on how much of the code can be obscured while still scanning. A frame can be added around the QR code with a "Scan Me" label.
QR Code Analytics
Every scan is tracked with the device type (mobile, tablet, desktop), browser, operating system, country, and city. View scan counts and analytics from the QR code list or the individual QR detail page. You can also enable or disable a QR code at any time.
What Is the Audience Add-on?
The Audience Add-on is an optional paid subscription that lets you import your existing email contacts into PromoLinks so you can send broadcasts to them. It is available on Pro plans and above and is billed separately from your base plan. Choose a capacity tier: 1,000, 5,000, 10,000, 25,000, or 50,000 contacts. For larger lists, contact the team.
Importing Contacts
Once the add-on is active, click "Import" on the Subscribers page. You can upload a CSV file (drag and drop or browse) or paste a list of contacts (one per line). PromoLinks auto-detects the email and name columns from your file. If it cannot detect them, you can manually select which columns to use. A preview table shows the first few rows so you can verify the data looks right before importing.
Validation & Deduplication
During import, every email is validated and duplicates are removed automatically, both within your upload and against your existing subscriber list. The import summary shows how many contacts are valid, how many were duplicates or invalid, and how many slots remain in your capacity. Up to 60,000 rows can be imported in a single upload.
Consent Confirmation
Before the import begins, you must confirm that all contacts gave you permission to email them and that you will only send content they expect. This consent checkbox is required. PromoLinks is not responsible for lists imported without consent.
Consent is required
You must confirm every contact gave you permission to email them. Importing lists without consent is not allowed.
Import Progress
Imports run in batches with a progress bar showing how many contacts have been processed. Keep the browser tab open until the import finishes. If you close the tab mid-import, the contacts processed so far are saved but the remaining ones will not be imported. If you hit your capacity limit during import, the process stops and a partial result is returned.
Locked Contacts After Cancellation
If you cancel the Audience Add-on, your imported contacts are not deleted. They stay in your account but are "locked": hidden from your subscriber list and excluded from broadcasts. If you re-subscribe to the add-on, all locked contacts are restored and become available again.
Feature Requests
Have an idea to improve PromoLinks? Visit the Feature Requests page from the footer to browse existing requests, upvote the ones you care about, and submit your own. Each request can be discussed in the comments, and our team updates the status as features move through the pipeline — from Pending to Under Review, Planned, In Progress, and Completed.
Your voice shapes the roadmap
Upvote the requests you care about and submit your own. We update each one as it moves from Pending to Completed.
Release Notes
Stay up to date with the latest improvements and new features. Click "Release Notes" in the footer to see a changelog of recent updates. We regularly ship new features, design improvements, and bug fixes — the release notes keep you informed about what's new.
Blog
Visit the PromoLinks blog for in-depth articles on music promotion, release strategies, and tips for growing your audience. Our blog covers topics like smart link best practices, pre-save campaign strategies, and how to make the most of your artist page. Access it from the footer under Company → Blog.
Still need help?
Our support team is here for you. We typically respond within 24 hours.