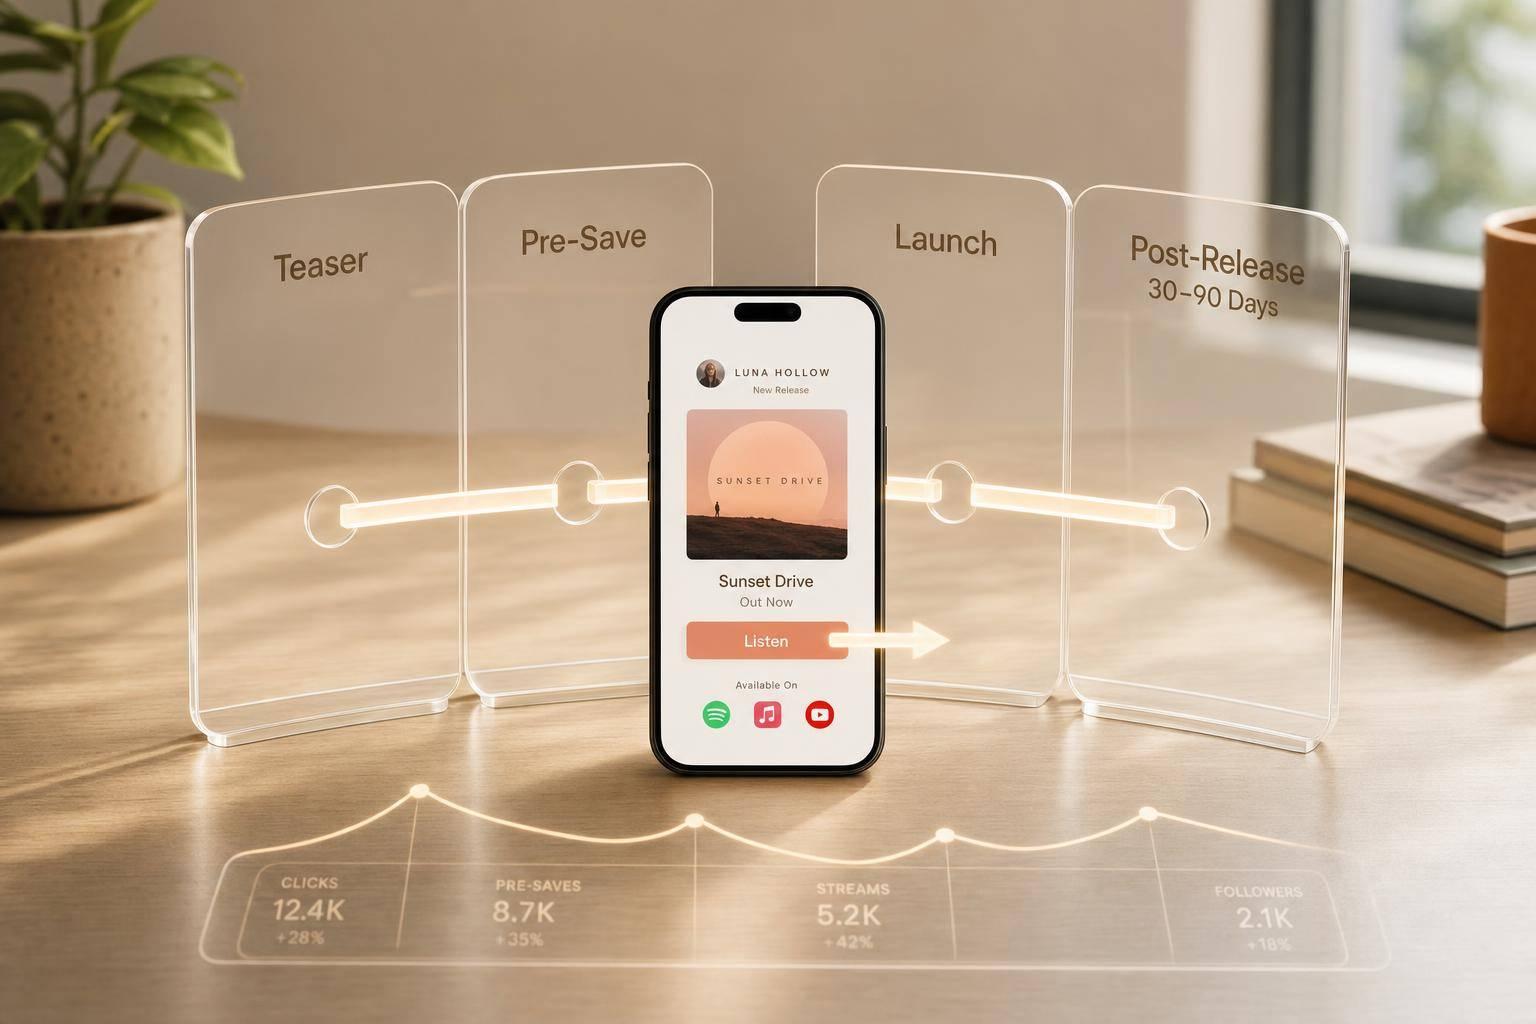
How to Use Smart Links for Release Rollouts
How to Use Smart Links for Release Rollouts
One link should handle your whole release campaign. I use the same URL from teaser posts to pre-save promos, release day, and the next 30 to 90 days so fans always land on the right page.
Here’s the short version:
- I set up the link after the release date, cover art, and delivery status are locked.
- I give each stage one main goal: awareness, pre-saves, streams, or post-release actions.
- I switch the page behind the same URL instead of posting a new link mid-campaign.
- I test it on iPhone, Android, Safari, Chrome, and in-app browsers before sharing it.
- I track clicks, regions, devices, and traffic sources so I know what to push next.
- I update the live page with videos, playlist links, merch, or tour dates as the campaign moves forward.
A few numbers stand out. Pre-save pages often convert around 15% to 35%. Many campaigns also see 80% to 90% of clicks come from mobile. That means my top button, page load, and app routing need to work well on phones.
If I want a clean rollout, the rule is simple: one phase, one ask, one link.
What are SMART LINKS and How Can Musicians Use Them?
sbb-itb-e819543
Plan the Rollout Timeline Before Building the Link
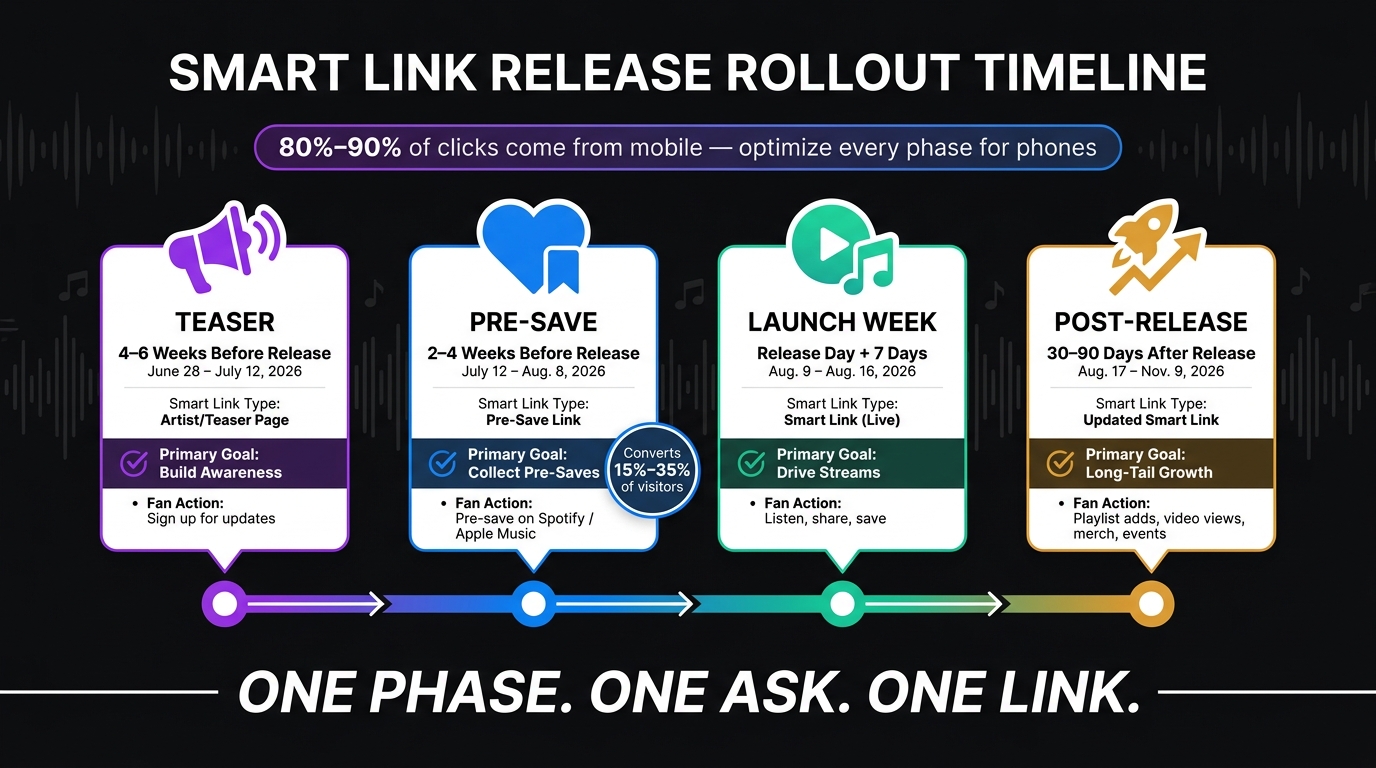
Smart Link Release Rollout Timeline: From Teaser to Post-Release
Set the release date, artwork, and delivery status before you build the link. That order matters.
A smart link works best when the rollout plan is already locked. Once those details are set, give each phase one goal and one destination. It keeps the campaign clean and stops the link from trying to do too many things at once.
What to Prepare Before Setup
Before you build the link, have these ready:
- A confirmed release date
- Final cover art
- The exact track title, including featured artist credits, explicit tags, or version labels
- ISRCs, if your distributor has issued them
- Confirmed delivery status from your distributor
- A short URL slug for the full campaign
- A clear primary call to action for each phase
One distribution guide recommends uploading your release at least 4 weeks before the release date. That gives you time for processing, playlist pitching windows, and room to fix metadata or artwork errors. Spotify editorial pitching, for example, is often described as needing submission at least 7 days before release, with 3 to 4 weeks preferred in practice. If those pieces aren’t cleared yet, don’t publish anything.
Match Each Phase to One Main Goal
Each phase has a different job.
The teaser phase is for awareness. The pre-save window is for collecting pre-saves. Launch week focuses on streams and shares. Then the post-release window keeps the song moving for 30 to 90 days, with goals like playlist adds, video views, merch sales, or event traffic.
Sticking to one goal per phase makes your analytics easier to read and your message easier to act on. Put simply: one phase, one ask.
Table: Rollout Phases, Link Type, Goals, and Timing
The timeline below shows how the same link takes on a different role across the rollout. Using Aug. 9, 2026 as the release date, the schedule looks like this:
| Rollout Phase | Smart Link Type | Primary Goal | Fan Action | Timing |
|---|---|---|---|---|
| Teaser | Artist/Teaser Page | Build awareness | Sign up for updates | June 28 – July 12, 2026 (4–6 weeks out) |
| Pre-Save | Pre-Save Link | Collect pre-saves | Pre-save on Spotify/Apple Music | July 12 – Aug. 8, 2026 (2–4 weeks out) |
| Launch Week | Smart Link (live) | Drive streams | Listen, share, save | Aug. 9 – Aug. 16, 2026 (Release Day + 7 days) |
| Post-Release | Updated Smart Link | Long-tail growth | Add to playlist, view video, buy merch | Aug. 17 – Nov. 9, 2026 (30–90 days after) |
Pre-save pages typically convert at 15% to 35% of visitors, depending on audience quality and how the campaign is set up.
Set Up the Smart Link, Store Routing, and Tracking
Build the Core Link and Add All Release Destinations
Once your rollout timeline is set, build one smart link that can carry the whole campaign. Start by pasting your main release URL into the dashboard. Then check the destinations it finds and add any missing services by hand.
Put the platforms your audience uses most at the top. You can sort by country too, but that usually only makes sense when your traffic data shows a clear need.
Keep the slug short, lowercase, and easy to read. Hyphens help. PromoLinks.me supports custom slugs and artist subdomains like artistname.promolinks.me/song-title.
Configure Routing, Branding, and Fan Actions
After the destinations are in place, set up the page design and behavior. Use the official release artwork as the main image. It should match exactly what fans see on DSPs and in your social posts. Pull accent colors from the cover art, but check that button text is still easy to read. Button names should fit the stage of the campaign: Pre-save before release day, then Listen now after the track goes live.
Country-based routing lets you change which services show up first based on a fan's location. If your audience leans heavily iPhone, it's smart to test Apple Music in the top spot for iOS users. If more of your traffic comes from Android, Spotify and YouTube Music often make more sense near the top.
You can also add a few fan-focused extras:
- Email capture to turn visitors into contacts you own
- A short audio preview to give people a taste of the track
- Print-ready QR codes for posters, flyers, and venue materials
PromoLinks.me supports fan email capture, audio previews, pre-save campaigns, and QR code generation.
Before you publish anything, test the public URL on both iPhone and Android. Check it in Safari, Chrome, and Instagram's in-app browser. A link that works fine in one place can still break or look odd somewhere else.
After testing, use that same link across teaser posts, pre-save posts, and launch-week content.
Table: Setup Items, Why They Matter, and When to Configure Them
| Setup Item | Why It Matters | When to Configure |
|---|---|---|
| Artwork | Establishes visual brand; must match DSP and social assets | Initial setup, before publishing |
| Platforms | Covers all major U.S. services so no fan hits a dead end | Initial setup; verify after auto-detection |
| URL Slug | Makes the link easy to share, remember, and repeat across assets | Initial setup |
| Analytics Tracking | Shows which channels and regions drive clicks and service selections | Before sharing the link publicly |
| QR Code | Connects physical promo (posters, merch, flyers) to the digital link | After the link is finalized; before print deadlines |
| Email Capture | Converts anonymous visitors into a direct contact list you control | During pre-save campaign setup |
Use the Smart Link from Teaser Posts Through Launch Week
Teaser Phase: Build a Stable Hub for Early Traffic
Once setup is done, use the smart link as your teaser hub. Put the release title, cover art, a short teaser clip, and one email signup CTA at the top. If you share a preview, label it "Sneak peek." Add follow buttons for your main platforms so early interest can turn into long-term followers.
Lock that URL into your bios from day one. Share 2–3 teaser clips per week and send people back to that same link every time. Use the same URL in bios, pinned posts, email, SMS, and QR codes. Repeating the same link helps you see which channels bring in clicks. It also gives you one place for QR traffic, email capture, and analytics.
Once the release is scheduled, turn that same link into pre-save mode.
Pre-Save Window and Release Day Switch-Over
Keep the same URL. The only thing that should change is the top CTA.
About two to four weeks before release, shift the page so pre-saving becomes the main focus. Update the top button to "Pre-save on Spotify & Apple Music." The goal here is simple: turn interest into saved libraries and owned contacts. Update your bio to: "Pre-save my new single - out on release day." Keep routing verified.
Pin a post on every platform that explains pre-saving in plain English:
"Hit the pre-save link in my bio so this track lands in your library on day one."
Send one or two focused emails with a single button that points to the smart link. If you're using SMS, keep it short and direct. Apple Music may require Safari instead of an in-app browser.
On release day, keep the same URL and change only the destination buttons. Switch the main CTA to "Listen now" and move live streaming links to the top. Keep the email capture form, but change the copy from "Get notified when it drops" to something like "Get new releases and behind-the-scenes content."
The schedule below shows how that same link should shift from D-2 through D+7.
Table: Daily Smart Link Actions from 2 Days Before Release to 7 Days After
| Day | Smart Link Configuration | Main Channels | Target Fan Action |
|---|---|---|---|
| D-2 | Pre-save active, store mapping verified | Social bios, pinned posts, email list, SMS | Pre-save and follow artist |
| D-1 | Add countdown messaging | TikTok/Reels, IG Stories with link sticker | Pre-save and join email list |
| D0 | Switch to "Listen now", live DSP links at top | All bios, email blast, SMS, YouTube description | Stream, add to playlists, follow |
| D+1 | Feature fan reactions | TikTok/IG clips with comment screenshots | Stream again and share link |
| D+2 | Emphasize playlist add CTA | IG Stories, X posts, Facebook groups | Add to personal playlists |
| D+3 | Add deeper engagement content | Long-form posts, email recap | Save track and engage with content |
| D+4 | Cross-promote on YouTube | YouTube community posts, video descriptions | Watch video and click smart link |
| D+5 | Push discovery through fans' networks | Duet/stitch prompts on TikTok, Reels remixes | Share link and tag friends |
| D+6 | Test alternative CTA copy | A/B posts on socials | Click through and follow artist |
| D+7 | Announce milestones, tease next content | Email newsletter, pinned one-week recap post | Stay subscribed and anticipate next release |
Keep one primary CTA for each phase: first pre-save, then listen now. Secondary actions, like email signup, should sit lower on the page. If you stack too many CTAs or swap the URL in the middle of the campaign, you break the path you've been building since the teaser phase. The same link should carry the whole campaign from teaser to stream.
Track Results and Update the Link After Release
Use Analytics to Guide the Next 30 to 90 Days
After launch week, the goal changes. At that point, it’s less about getting a burst of clicks and more about figuring out which channels keep the song moving over the next 30 to 90 days.
Check your music analytics that matter once a week for eight weeks. Watch outbound clicks, top regions, referral sources, and device mix. Those patterns tell you where to put your next bit of time and budget.
Here’s what that can look like in practice:
- If Texas and California start sending a spike in traffic, test small geo-targeted ad sets in those states at about $5 to $10 per day instead of running broad U.S. campaigns.
- If 80% to 90% of clicks come from mobile, your top CTA should be easy to tap and load fast.
Use UTM tags for each push, such as utm_source=tiktok_clip or utm_source=email_blast, so you can compare channels side by side. Smart links can also use tracking pixels, which lets you build retargeting audiences from people who clicked your link.
Refresh the Link with New Content and Offers
Once you know what’s converting, update the page to match. As the campaign moves forward, log into your dashboard and add new destinations or rearrange the ones already there. If a playlist placement lands, move that button closer to the top. If your music video, lyric video, or behind-the-scenes clip goes live, add it as a new destination and reorder the buttons so the new release is easy to spot. If a press quote comes in, drop a short pull quote into a description block to help build trust with new visitors. Update destinations in place as new assets go live.
When traffic starts to level off, use the same link for merch, tickets, or a new release. A few weeks after release, you can add a merch or bundle button above the streaming options if the goal is to turn interest into revenue. For touring artists, an event page with U.S. tour dates in MM/DD/YYYY format and city-specific ticket links can help turn listeners into ticket buyers without changing the link. Your current QR codes, bio links, and older posts can still point to the updated page.
At 30 and 90 days, review which channels, content types, and regions drove the best saves, streams, and signups. That record becomes your playbook for the next rollout: the same top-converting platforms, similar regional targeting, and a much better read on where each dollar should go.
Table: Post-Release Tactics, Advantages, Limitations, and Best Timing
| Post-Release Tactic | Advantages | Limitations | Best Timing |
|---|---|---|---|
| Highlight playlist placement | Builds social proof; drives streaming volume | Depends on external editorial decisions | Weeks 1–6 after release |
| Add music or lyric video | Increases time on page; boosts YouTube views | Requires video production time and budget | 3–7 days after release |
| Email/SMS broadcast | Direct, high-conversion; bypasses algorithms | Requires an existing captured audience list | Release day and major updates |
| Retargeting ads | Targets fans who already clicked; can be more efficient than cold ads | Requires pixel setup and ongoing ad spend | 7–30 days after release |
| Merch or bundle offer | Generates revenue; deepens fan relationships | Less appealing to casual listeners | 4–12 weeks after release |
| Add tour or event page | Converts listeners into ticket buyers | Only useful if active dates are booked | 2–8 weeks before show dates |
| Remix or acoustic version | Refreshes the link for a second traffic wave | Requires additional creative assets | 30+ days after release |
| Press quote or blog feature | Adds credibility for new visitors | Impact fades quickly if not promoted | Within days of publication |
FAQs
When should I create my smart link?
Create your smart link as soon as your distributor confirms the release date.
For a rollout, set up the pre-save 2–4 weeks before release day. The sweet spot is usually 2–3 weeks before. That gives people enough time to act without letting the link sit too long and lose steam.
Skip it during the earlier teaser phase. At that point, you’re building curiosity, not asking for clicks yet.
On release day, the link switches from pre-save to full streaming automatically. After the first week, keep it live in your bio for at least a month. Then use PromoLinks analytics to see what’s working and plan your next push.
How often should I update the same link?
You usually don’t need to change the URL itself. PromoLinks lets you update a published link without changing the shared address.
On release day, switch the destination from the pre-save page to the live streaming page. After that, refresh it whenever you put out new music or update your artist page, and keep it in your social bios for at least one month after release.
What should I track after release day?
After release day, keep a close eye on performance in the PromoLinks.me real-time analytics dashboard so you don’t lose momentum.
Start with your click-through rate. It’s one of the clearest signals that your design and call to action are doing their job. If people are seeing the page but not clicking, that usually means something needs work.
Then check your top referrers. This shows which social platforms are sending the most traffic, so you can put more effort where people are already responding.
It also helps to watch your pre-save-to-stream ratio. A healthy range is 1.5 to 2.5. If your number falls outside that range, it may point to a gap between early interest and actual listening behavior.
For sharper tracking, use UTM parameters to pinpoint traffic sources. And with pixel tracking, you can build retargeting audiences for future ads.
Related Blog Posts
Ready to create your smart links?
Join thousands of artists using PromoLinks to promote their music smarter.
Get Started Free