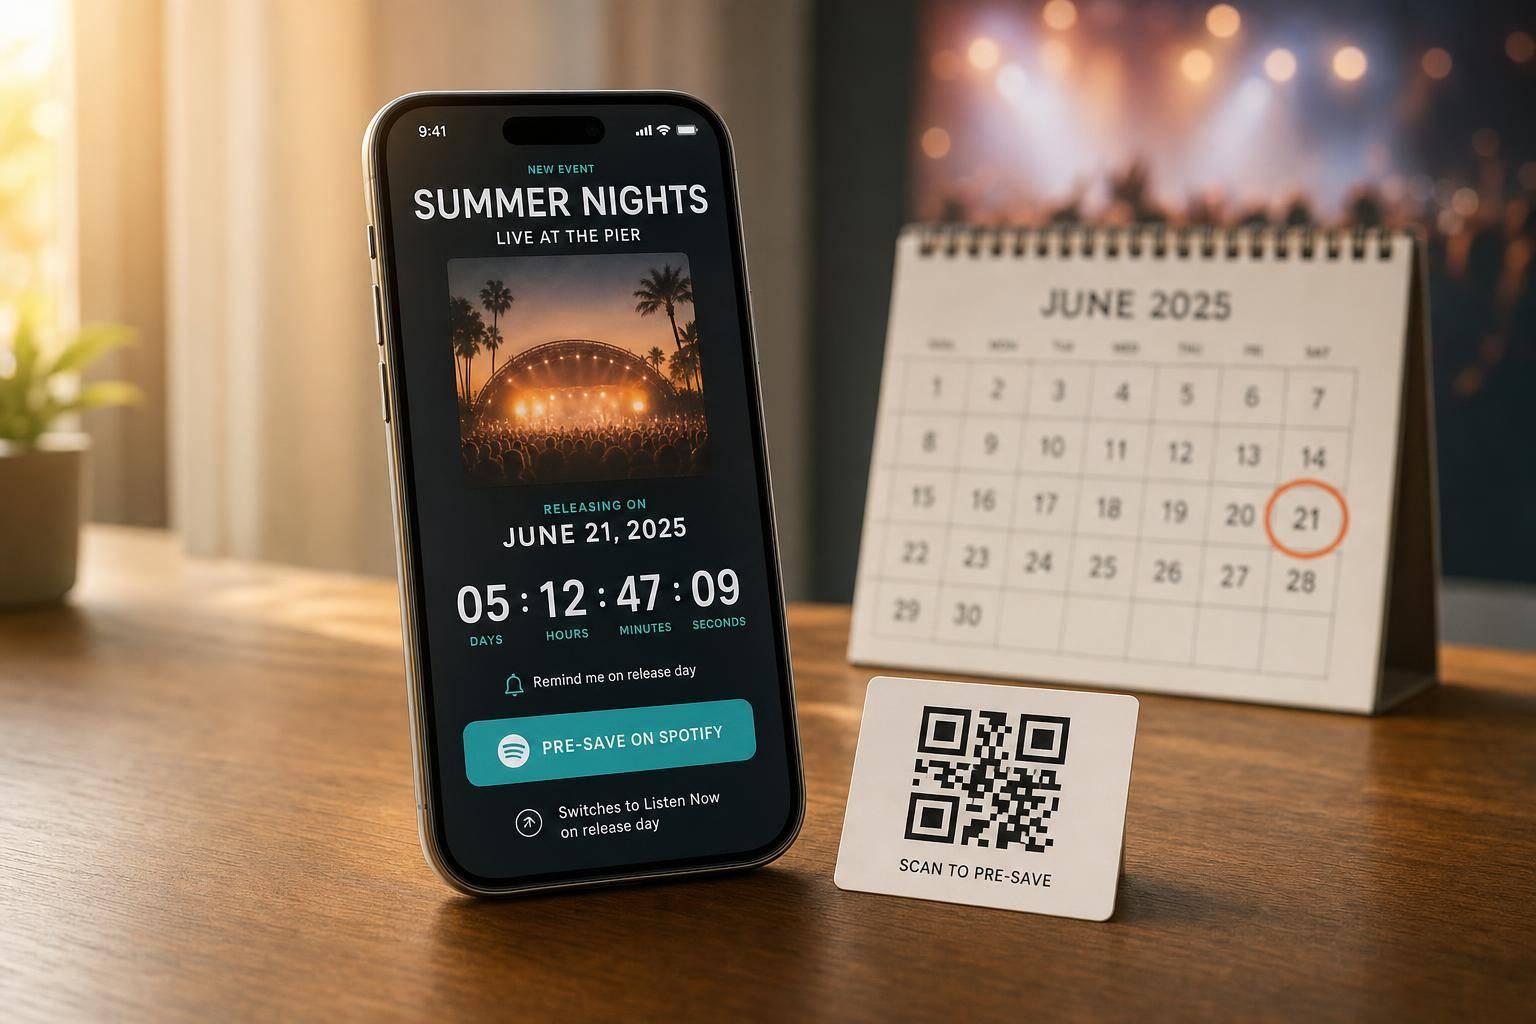
Timed Pre-Save Campaigns: Guide for Event Releases
Timed Pre-Save Campaigns: Guide for Event Releases
If I tie a music release to a live event, I need one date, one link, and one clear switch at go-live. That is the core idea. The article shows that timed pre-save campaigns work best when I build the rollout around the event itself, use the same URL from announcement through release, and line up reminders with ticket sales, RSVP cutoffs, and venue deadlines.
Here’s the short version:
- I start with the event date and work backward.
- I choose a pre-save window based on the event type: tours, festivals, listening parties, or launch shows.
- I keep one smart link live the whole time, then switch it from pre-save to "Listen Now" at release.
- I place that link everywhere: bio, email, ticket page, QR codes, posters, and venue screens.
- I test the full flow before launch, including mobile, QR scans, email capture, and the release-day switch.
- I track what happened after go-live: clicks, pre-saves, QR scans, platform split, traffic sources, and email signups.
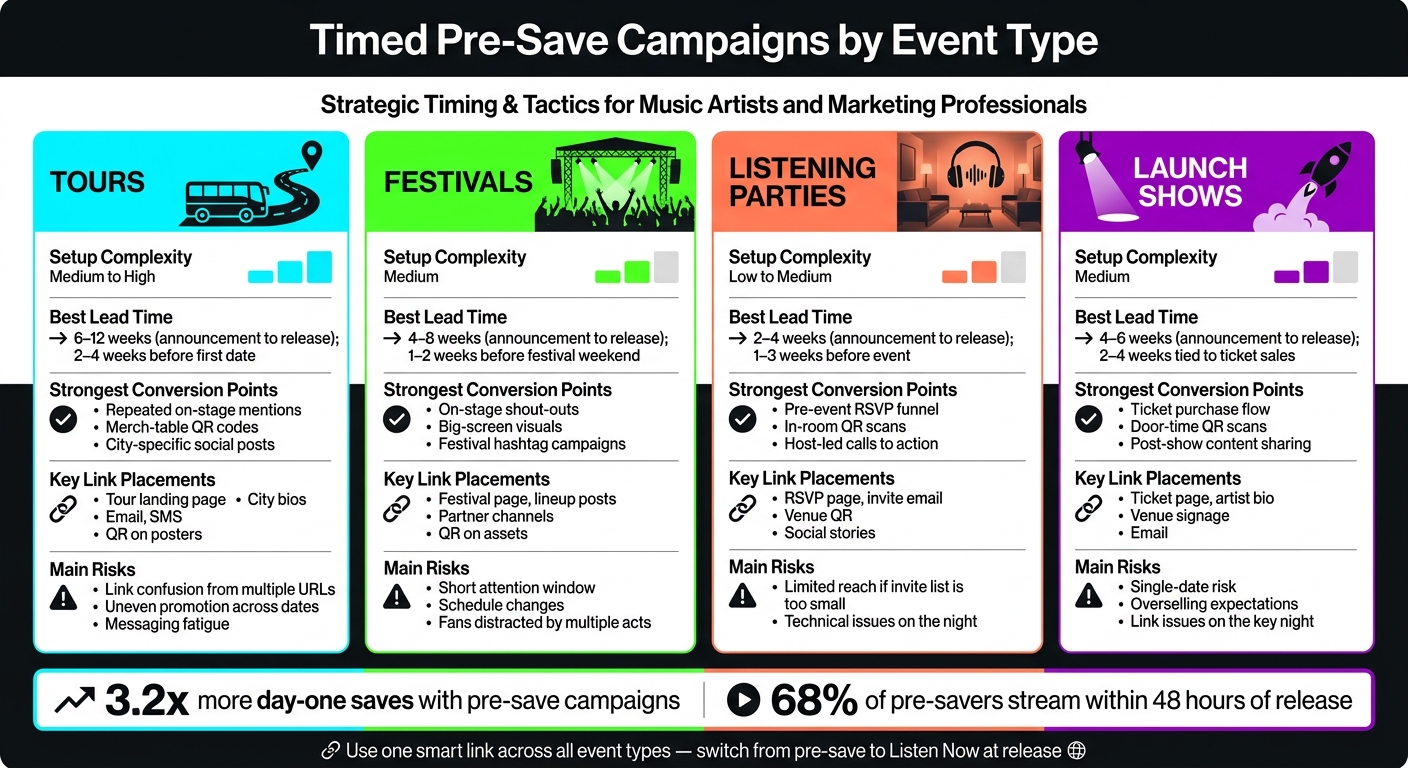
The article also gives a few numbers that explain why this matters. Artists using pre-saves see 3.2x more day-one saves, and about 68% of pre-savers stream within 48 hours. So the link matters - but the timing and the handoff matter just as much.
If I had to sum it up in one line, it would be this: an event release works best when fans move through one simple path - awareness → pre-save → release-day listening - without hitting extra steps or extra URLs.
Plan the campaign around the event date
Start by locking the release date. Then work backward from the event itself.
Once that date is set, use it to map the pre-save window and every reminder. If the date changes, update everything tied to it: live pages, signage, and QR codes.
For U.S. campaigns, release timing is often set to 12:00 a.m. Eastern Time, or to the artist’s main market time zone, so the handoff stays clear across regions. At the exact release time on the DSPs, the page should flip from pre-save mode to a live release link. Just as important, it should keep the same URL so existing QR codes, bio links, and posters still work.
Choose the right pre-save window for each event type
The pre-save window should fit the event format. A tour and a listening party don’t move at the same pace, so the timing shouldn’t be the same either.
| Event type | Recommended lead time | Strongest promotion moments | Key link placements |
|---|---|---|---|
| Tours | roughly 6–12 weeks | Announcement, ticket drop, final 2 weeks, city-by-city day-of reminders | Tour landing page, city bios, email, SMS, QR on posters |
| Festivals | roughly 4–8 weeks | Lineup reveal, set-time announcement, week-of urgency | Festival page, lineup posts, partner channels, QR on assets |
| Listening parties | roughly 2–4 weeks | Announcement, RSVP push, final 72 hours, day-of reminder | RSVP page, invite email, venue QR, social stories |
| Launch shows | roughly 4–6 weeks | Show reveal, ticket open, final week, live-switch | Ticket page, artist bio, venue signage, email |
Build a date ladder from announcement to release day
After you’ve set the window, map your music marketing checklist from announcement through release day. Use five checkpoints. For example, if the launch show is on September 11, 2026, with a 12:00 a.m. ET release, the timeline could look like this:
- August 21 - Announce the show and publish the pre-save link at the same time.
- August 28 - Make an early push. Share the link across social, email, and the venue page.
- September 1–7 - Run the reminder window. Use event-specific copy like pre-save before doors open so the message fits the moment.
- September 8–10 - Make the final 72-hour push with urgency-driven messaging across every channel.
- September 11, 12:00 a.m. ET - The pre-save page switches to a live release link automatically.
Keep the public path simple. Let the switch happen behind the scenes.
Account for ticket sales, RSVP deadlines, and venue approvals
Once the calendar is in place, line it up with ticketing, RSVPs, and venue deadlines.
If tickets go on sale before the pre-save campaign is live, you’ve missed one of the strongest intent signals. Both actions should be ready at the same time.
Venue approvals matter too. Screen graphics and printed signage often need to be submitted days, and sometimes weeks, before the event. Lock the link structure before print deadlines, then keep later edits limited to copy. It also helps to use one system for the event page, QR codes, email capture, and the live switch. That cuts down on mismatched assets across channels, especially when multiple dates or markets are in play.
RSVP cutoffs need to be part of the reminder schedule as well. The final push should land before the deadline, not after it. And if ticket on-sale and the release announcement are both happening in the same week, space them out by at least a few days so they aren’t fighting for the same attention.
sbb-itb-e819543
Set up the pre-save campaign and event link system
Once the schedule is locked, set up the link system that will carry the campaign all the way to release day. Do this before the first poster goes up or the first email goes out.
Set up link targets and the release-day switch
Start by building the link system before promotion begins. Check your release metadata with your distributor: final audio master, artwork, release date, and time zone. For U.S. campaigns, that often means 12:00 a.m. ET on release day, though some launches use a set local time tied to the event. You also need to decide if the campaign will go live at one global time or roll out territory by territory.
About 1–2 weeks before release, collect the Spotify URI, UPC, and ISRC so you can load them into the campaign dashboard and set up the switch ahead of time.
Use one URL for both pre-save and release-day listening. That same link should flip from pre-save to the live release when the music is out. PromoLinks.me is built for this setup: you can set the pre-save state, schedule the release timestamp, and preload the live version with your streaming destinations.
Add event pages, QR codes, and email capture
Use that same link for event pages, QR codes, and email capture too. Build an event landing page on the same URL so fans at the venue can see the date, location, ticket button, and a clear pre-save CTA. Add the link to ticket confirmations and RSVP pages before the event starts.
QR codes help turn offline attention into clicks. Put them on:
- Entrance posters
- Bar cards
- Merch signage
- Stage screens
Place email capture right next to the CTA. A simple line like "Get a reminder when the single drops" tells people exactly what they get. That email list gives you a direct way to send an "it's live now" message on release day to fans who already signed up.
Keep branding and copy consistent across all assets
Keep the branding tight across every asset. Use one version of the release name, one cover image, and just one or two CTA phrases across the smart link page, email header, Instagram Story, and venue poster.
Before release, use a CTA like "Pre-Save Before the Show." After release, switch it to "Listen Now." In the U.S., "pre-save" is the clearest wording for Spotify listeners, so don't mix in terms like "pre-add", "pre-register", or "pre-follow."
PromoLinks.me's customizable templates help keep fonts, colors, and button text aligned across music links, event pages, and QR assets.
Test the link flow before the first announcement
Test the whole flow before you announce anything. Check every button on desktop and mobile. Make sure the pre-save flow works on Spotify and Apple Music, and confirm that YouTube links open the right way.
Also test the support pieces:
- Scan a printed QR code proof
- Submit the email capture form
- Check that the contact shows up in your list
- Run a test of the release-day switch
When you test the switch, make sure the layout, CTA labels, and destination URLs update the way you expect. In-app browsers can break Apple Music pre-saves, so tell fans to open the link in Safari.
Once everything works, stick with that same link across every fan touchpoint.
Guide fans from event awareness to pre-save to release-day listening
The goal is simple: a fan hears about the event, taps one link, finishes the pre-save, and comes back on release day without wondering where to click. Every extra step or extra URL between those moments is a drop-off point.
Use one link across all event touchpoints
Once your link system is set up, the next step is keeping fans on the same path. Use the same campaign link everywhere fans might find you: announcement posts, your artist page or link-in-bio, email blasts, ticket confirmation emails, venue signage, and QR codes at the door.
Don’t switch links halfway through the campaign. After the release, that same URL can send fans to the live track, which means printed materials and pinned links still work.
Match the CTA to where the fan is in the journey
The link stays the same, but the wording should change as the campaign moves along. Before the release, use direct copy that fits the moment. For a tour stop, something like "Pre-save before tonight's set" works well.
At a festival, shorter is better. People are distracted, moving around, and looking at a lot at once. "Scan to pre-save in seconds" is often enough.
On launch night, change the message completely: "The release is live - listen now." The CTA changes, not the link. That small shift makes the next step feel obvious, which matters a lot on mobile.
Cut friction on mobile and at the venue
Most fans who tap your link are on their phones. So the page should load fast, show one clear button, and ask for as little as possible. If the path feels clunky, people bail.
QR codes help because fans don’t have to type a URL in a loud, crowded space. Add a short prompt next to each code, like "Scan to pre-save." And send the QR code straight to the campaign page, not your homepage. Every extra tap hurts conversion.
PromoLinks.me's QR code and event page tools can help keep that path tight, while real-time analytics show you which placements are driving clicks. That same low-friction path matters even more in a packed venue or a fast-moving festival crowd.
Adjust the campaign by event format
Timed Pre-Save Campaign: Event Type Comparison Guide
Once your link flow is set, tailor the rollout to the event format. The basic setup stays the same. What changes is the timing, the wording, and how you handle the live moment.
Tours: run one release link across multiple dates
Use one primary release link for the full tour. Put it on merch table cards and venue screens.
What should change from stop to stop is the copy around that link. A line like "Pre-save before we hit Austin Friday night" feels tied to the city without forcing you to build a new page or swap in a new URL.
If you want to see which stops drove more pre-saves, add UTM parameters to city-specific QR codes. The destination stays the same. Only the city-based wording changes.
Festivals: work within short attention spans and shared lineup
Festival promo moves fast. You usually have less control over attendee messaging, set times often show up late, and your pre-save CTA needs to appear early.
That means it should show up in places like:
- the lineup graphic
- the set-time announcement post
- any day-of content
It also needs to be short enough to fit on a stage screen or poster.
Before the set, something like "Pre-save before our 3:30 PM set" works well. After the set, switch right away from discovery mode to release-day action.
Listening parties and launch shows: tie the release switch to one moment
These formats tend to work best when the whole campaign points to one clear moment - doors open, the host's announcement, or midnight.
You can start countdown posts 24 to 72 hours before the event. Then use door-time messaging to drive scans as people arrive, and have the host deliver the final CTA right before the switch.
When the countdown, the on-site signage, and the host's words all use the same language, the release moment feels like part of the event. PromoLinks.me's event pages and real-time analytics can help coordinate that switch and confirm it is working the moment the release goes live. That timing sets up the release-day switch and the final tracking step.
Run the release-day switch and measure what worked
Handle the live-release moment without breaking the campaign
With the event date locked in, start your release-day check a few hours before the track goes live. Flip the smart link from pre-save mode to live streaming destinations, change every CTA from "Pre-Save" or "Coming Soon" to "Listen Now," and remove time-based lines like "drops tonight."
Then check the basics. Make sure Spotify, Apple Music, YouTube, and any other platform buttons open straight to the release. No dead ends. No old pre-save pages. No extra clicks.
Time the switch to the event itself - maybe right before doors open, just before your festival set, or ahead of the first public play at a listening party. That way, every on-site mention, screen, and QR code sends people to a live link when they act on it. Have one person watch the first hour after go-live so any link issue gets fixed fast.
Once the link is live, the first traffic burst gives you a clean read on which event touchpoints drove the most action.
Track clicks, pre-saves, platform split, and email capture
After the release goes live, look at the metrics that tie event activity to streaming results:
| Metric | What it measures | How it improves the next campaign |
|---|---|---|
| Total link clicks | Overall reach | Gauge whether event announcements and CTAs were strong enough |
| Pre-save conversions | Visitors who pre-saved before release | Shows how effective your pre-release pitch and lead time were |
| Platform split | Distribution across Spotify, Apple Music, YouTube, and others | Helps prioritize platform buttons and future platform-specific promo |
| Traffic sources | Clicks by channel: social, email, direct, QR, or ads | Shows which channels converted best |
| QR scans | In-venue or physical-material engagement | Refine signage placement, QR size, and on-stage callout timing |
| Email capture | Fans who joined your list and how they responded to follow-up | Grows your email list for future releases |
PromoLinks.me's blog and real-time analytics dashboard brings clicks, platform split, traffic sources, QR scans, and email capture into one place, so you can check performance without stitching together data from a bunch of different services.
These numbers help you tighten the next event's timing, CTA, and QR placement. If one sign got ignored while another pulled scans all night, that's useful. If most listeners tapped Spotify and barely touched Apple Music, that tells you something too.
Compare common event-release setups
Use this table to line up your next release with a campaign setup that fits your resources and risk tolerance:
| Event type | Setup complexity | Best lead time | Strongest conversion points | Main risks |
|---|---|---|---|---|
| Tours | Medium to high | 2–4 weeks before the first date | Repeated on-stage mentions, merch-table QR codes, and city-specific social posts | Link confusion if different URLs are used; uneven promotion across dates; messaging fatigue if it is not refreshed |
| Festivals | Medium | 1–2 weeks before the festival weekend | On-stage shout-outs, big-screen visuals, and festival-specific social and hashtag campaigns | Short attention window; schedule changes; fans distracted by multiple acts and activities |
| Listening parties | Low to medium | 1–3 weeks before the event | Pre-event RSVP funnel, in-room QR scans, and host-led calls to action | Limited reach if the invite list is too small; technical issues on the night |
| Launch shows | Medium | 2–4 weeks, tied to ticket sales | Ticket purchase flow, door-time QR scans, and post-show content sharing | Single-date risk; overselling expectations; link issues on the key night |
Conclusion: Build event releases around one timeline and one link
The best event-based pre-save campaigns usually feel simple from the fan's side. Start with the event date, then work backward to set a pre-save window you can actually support. Use one smart link that handles both pre-save and live streaming, keep that same URL active across every touchpoint, and review performance within a few days.
It also helps to plan the release-day switch ahead of time. When you do that, the campaign feels like one continuous run instead of two disconnected phases. Write down what worked, what slipped, and what you'd change next time.
FAQs
When should I start a timed pre-save campaign?
Launch your pre-save campaign 2 to 3 weeks before the release date. That window usually gives fans enough time to see the link a few times and take action, without the buzz wearing off.
If you start more than 4 weeks in advance, interest can fade. If you launch too close to release day, you may not have enough time to build traction.
Why use one link for the whole campaign?
Using one link for your whole campaign makes things simpler for fans and a lot easier for your team. Instead of juggling separate URLs for Spotify, Apple Music, and other platforms, you can keep everything in one place with a single PromoLinks.me link.
That same link stays active for the entire campaign. Before release, it works as a pre-save page. Once the music goes live, it automatically switches to a smart link. So your posters, bio, and other promo assets can keep the same URL from start to finish. No last-minute edits. No swapping links across every channel.
What should I test before release day?
Before release day, test your full campaign flow so you don’t get blindsided by technical issues.
Go through the entire pre-save flow yourself with your Spotify or Apple Music account. Then check that your test emails show up in your PromoLinks.me dashboard.
Also, review every shared link on both mobile and desktop. Make sure the streaming buttons send people to the right places, the main call to action stays visible on mobile, and your Open Graph tags and release URLs are correct.
Related Blog Posts
Ready to create your smart links?
Join thousands of artists using PromoLinks to promote their music smarter.
Get Started Free